
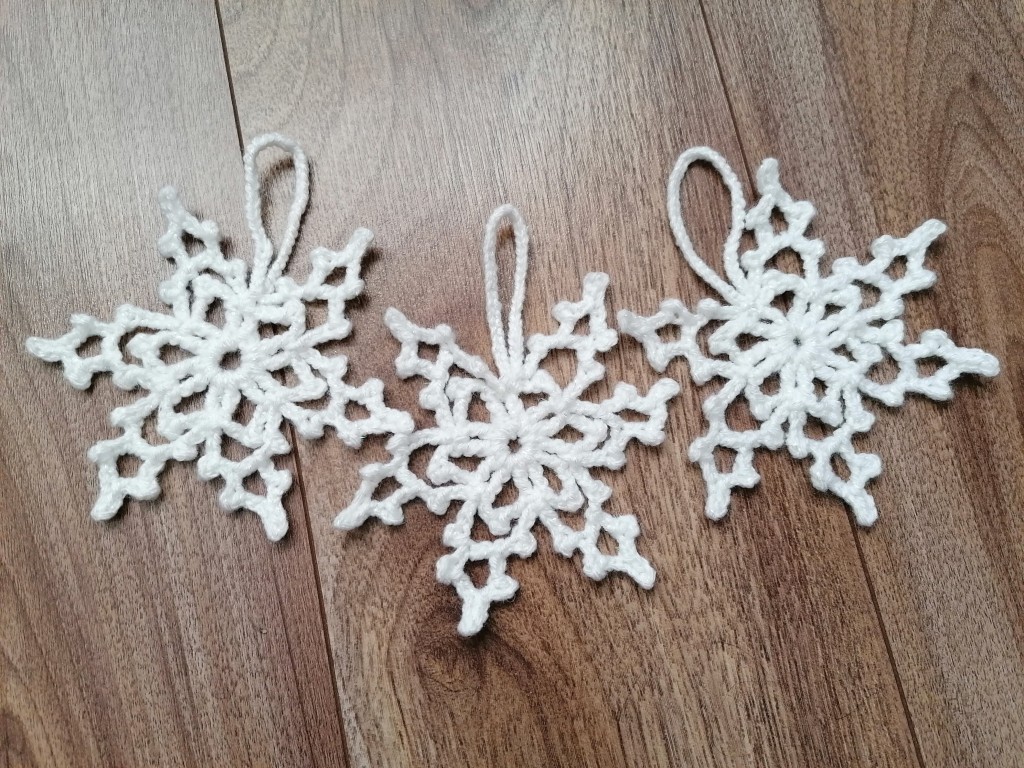
When it comes to decorating your home and Christmas tree, adding a bit of crochet can take it from festive to fabulous! There are a lot of Christmas crochet patterns, but none is quite so magical like a snowflake.
Snowflakes are such a magical motif. Every single one is unique from the others; they’re like the fingerprints of our Creator.
Let it snow, let it snow, let it snow with this pretty free snowflake crochet pattern! We’ve got a fabulous crochet snowflake pattern for you to try.
This free snowflake crochet pattern will look great made in a plain white yarn, but to make it extra special we recommend making it using some glittery yarn for a shimmering snowflake effect.
These crochet snowflakes are super-easy to make, and super-addictive. They are worked up in three quick rounds, and you can vary the size of them depending on the yarn you use and the hook size you choose.
The pattern also includes tips on how to join your snowflakes together, or you could try stiffening them with PVA glue or sugar starch if you fancy using them as crochet Christmas decorations!
Many people like to stiffen their crochet snowflakes, especially if they’re using them for decorations. There are a couple of ways of doing this, but by far the easiest is to use PVA glue. You can either soak your crochet snowflake in the glue or simply cover the reverse with a paintbrush, then leave to dry!
You can also easily adjust the hook and yarn size to create different snowflakes – why not try using a cotton thread and small hook to make a tiny crochet snowflake, or take things super-size with some jumbo yarn and make a big snowflake to use as a door decoration!
The yarn I used making these easy crochet snowflakes and which I highly recommand is Caron Simply Soft Party Yarn, 3 oz, Medium Worsted 4 Gauge, – Snow – For Crochet, Knitting & Crafting. It is shinny an super soft to touch. I used a 2.25mm size crochet hook.
This crochet pattern is free to view online below. You also have the option to purchase the ad-free pattern PDF download HERE.

Add it to any project to create a wintry feel.
Before you start I prepared for you some Essential Crochet Tips & Tricks to Learn
Magic ring
Nearly all, if not all crochet projects that are worked in a round start with a magic ring.
It’s an alternative to chaining and slip stitching into the first chain to create a ring.
With a magic ring the middle of the project is completely sealed, whereas, with a chain & slip stitch, there’s a hole in the center.
There are two ways to create a magic ring:
First method:
Take the beginning of your yarn and make a loop with it, crossing the end under the yarn coming from the skein.
Hold the part where the yarns come together with your fingers.
Let the yarn from the skein go behind your loop, insert hook under that yarn and over, to grab the furthest side of the loop.
Pull the loop through to the top of the ring.
While continuing to hold the loop (with any finger other than the ones holding your hook). Let go of the part where the two yarns cross.
If you’re doing a project in single crochet, chain 1 and complete your stitch. If you’re doing your project in double crochet, chain 2.
Crochet the stitches in your ring according to your pattern.
Second method:
Wrap the yarn around two of your fingers twice, to where the yarn makes an “X” shape on your fingers.
Using your hook, go over the first string and under the second, twist, and pull through.
Do your first few chains in this ring.
Tying Yarn Together (when a skein is ending and you’re starting another one)
When you’re working on a longer project that requires multiple skeins (or balls) of yarn, it’s important to know how to correctly connect the two yarns together.
Tying it in a knot is an option, but there’s no guarantee that they will not come apart.
Also, it leaves two small tails out that are a bit difficult to work into your project.
Using what’s called a Magic Knot, you’re creating a more seamless transition
Here’s how:
Continue crocheting until there are roughly three inches left of the yarn you’re currently using.
At that point, take your new yarn and hold it next to your old yarn, leaving a tail of about three inches of the new yarn.
Crochet one stitch holding both yarns together, then drop the old yarn and continue crocheting with the new one.
This method keeps your project from having bumps and knots everywhere and is a foolproof way to keep your yarns from separating.
Switching Colors
When you move on to more complicated crochet projects, you’ll probably start to switch colors while you’re working.
If you’re creating a stripe pattern with yarn that is not self-striping or you’re doing a color block project, you’ll want to seamlessly transition between the two colors for a clean, neat look to your project.
Here’s how:
Right before you stop crocheting, start doing a normal stitch with your current yarn. Insert the hook, yarn over, pull up a loop, then stop.
Finish the stitch with your new yarn by putting the new yarn on the hook and holding the tail with your fingers. Keep crocheting with your new yarn.
This is a simple but effective way to switch yarn colors.
Chainless Foundation Chain
A chainless foundation chain is a crochet term for combining the first row of chains and the first row of stitches into one.
This technique overall makes crocheting easier. It keeps the first row of regular stitches from twisting like it normally does.
It also prevents the frustration of realizing you miscounted the chains on your bottom row since you’re doing the base chains and first row of stitches together.
Here’s how to do a foundation chain (single crochet):
Create a slip knot and chain 2.
Insert hook into the first chain so that it grabs the left of the first chain and the center of the stitch.
Yarn over and pull up a loop. There should be two loops on your hook.
Yarn over and draw up another loop.
Yarn over and insert hook through both loops. You have created the first single crochet.
For the next stitch, insert the hook into the chain of the previous stitch, and repeat the same process from part one. (Insert, yarn over, draw loop, yarn over, draw loop, yarn over, draw through both loops.)
Continue to work your single crochets, but work them vertically. It will be easier than trying to do it horizontally.
You’ve now saved yourself some time and learned a new crochet skill!
Crocheting Over Ends
Weaving ends in is the bane of the crocheter’s existence.
It takes a long time and is tedious. But luckily, there’s another way to keep those ends in without weaving or cutting them.
After you’ve cut your yarn, hold the end of the yarn up to your current row to crochet over it until it disappears.
This gets them out of the way and saves you the pain of weaving them in.
I hope these crochet techniques help you to become a better crocheter and make this craft even more enjoyable!
The pattern uses most double crochet stiches. It can be made by the beginners as well as by advace crocheters.
Terminology for the Crochet Snowflake Pattern
Ch: Chain
Sl St: Slip Stitch
Trc : Triple Crochet
Dc: Double Crochet
St(s) Stitch(es)
Beg Beginning
Easy Crochet Snowflakes Patterns:
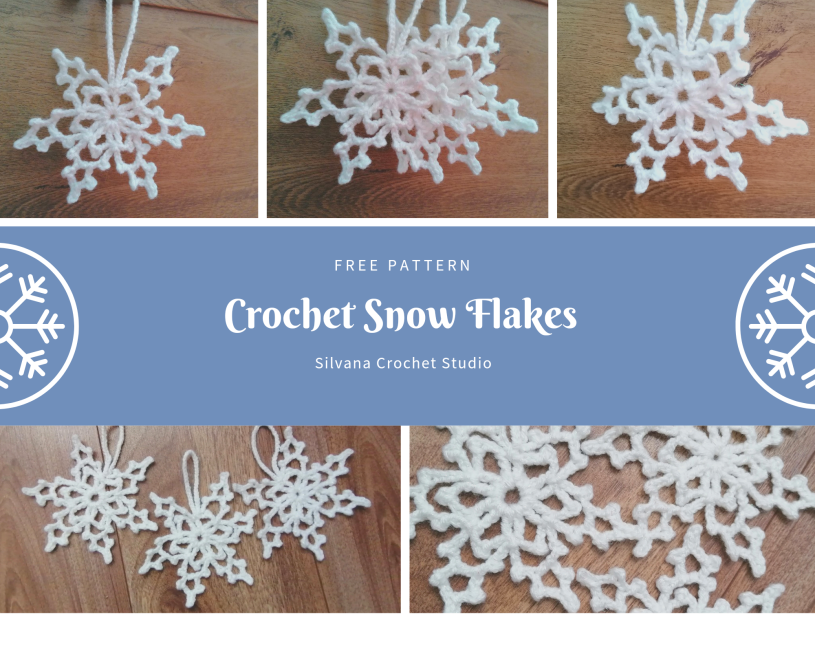
Round 1 :Ch 7, sl st to the first ch to form a ring.
Round 2: Ch 4, tr into ring, ch5, picot with sl st into 3rd ch from hook, ch3, *2 tr into ring, ch5, picot, ch3*. Repeat from * to * 4 more times, sl st to top stitch of starting chain. (6 points)
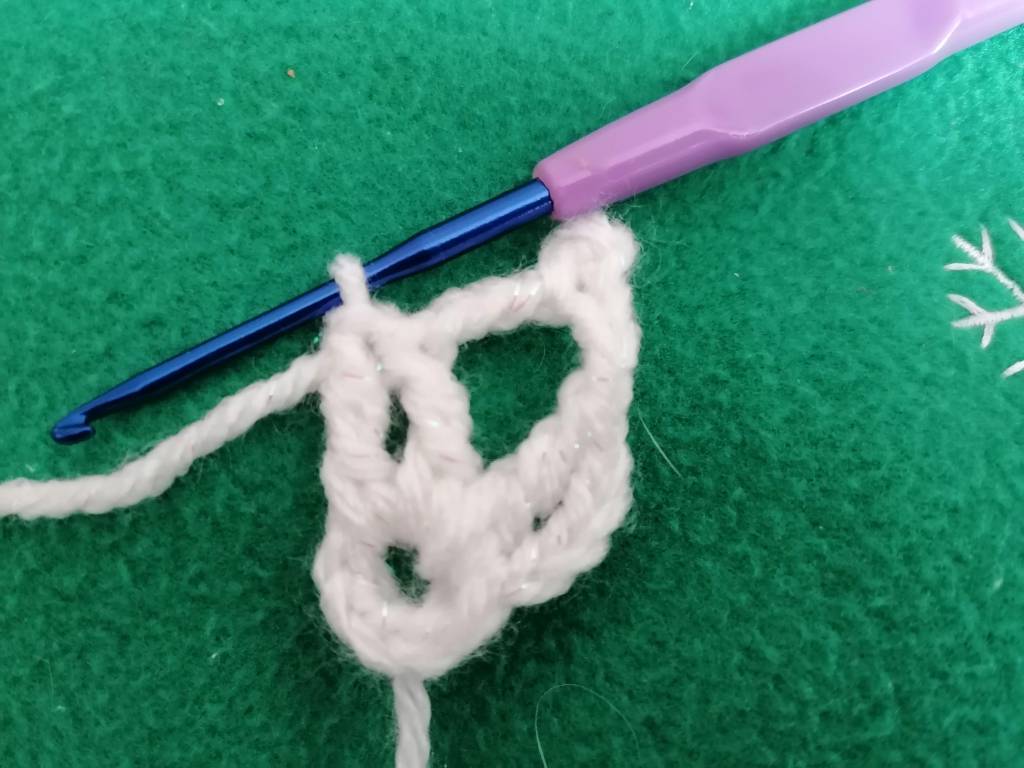
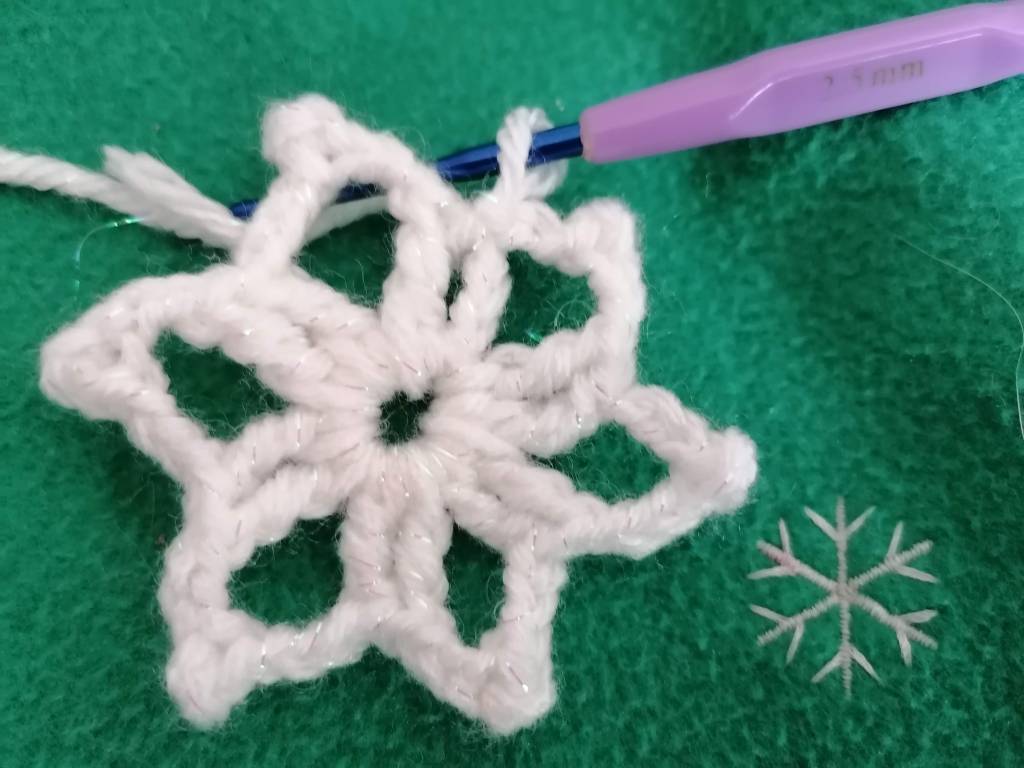
Round 3: *Ch 6, picot with sl st into 3rd ch from hook, ch 6, picot, ch 6, sl st to 2nd stitch from hook, sl st to each of next 2 stitches, ch 4, picot, ch2, dc to ch between 1st two picots (see image), ch4, picot, ch3, sl st between 2 tr of previous round*. Repeat from * to * 5 more times. (6 points)


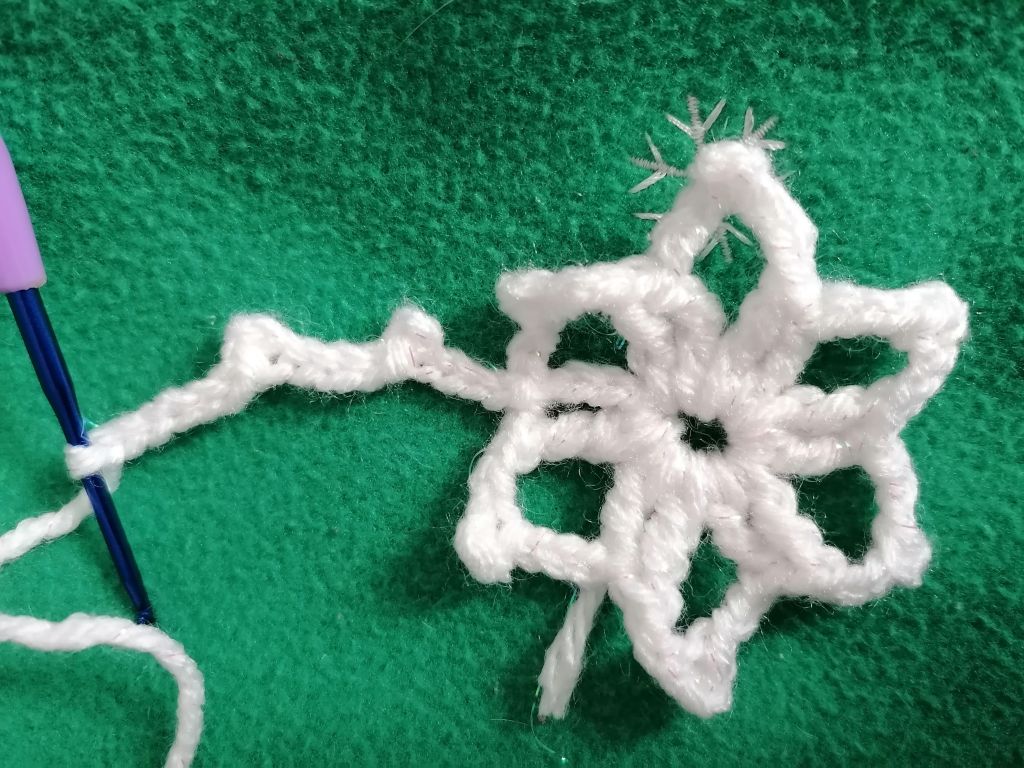
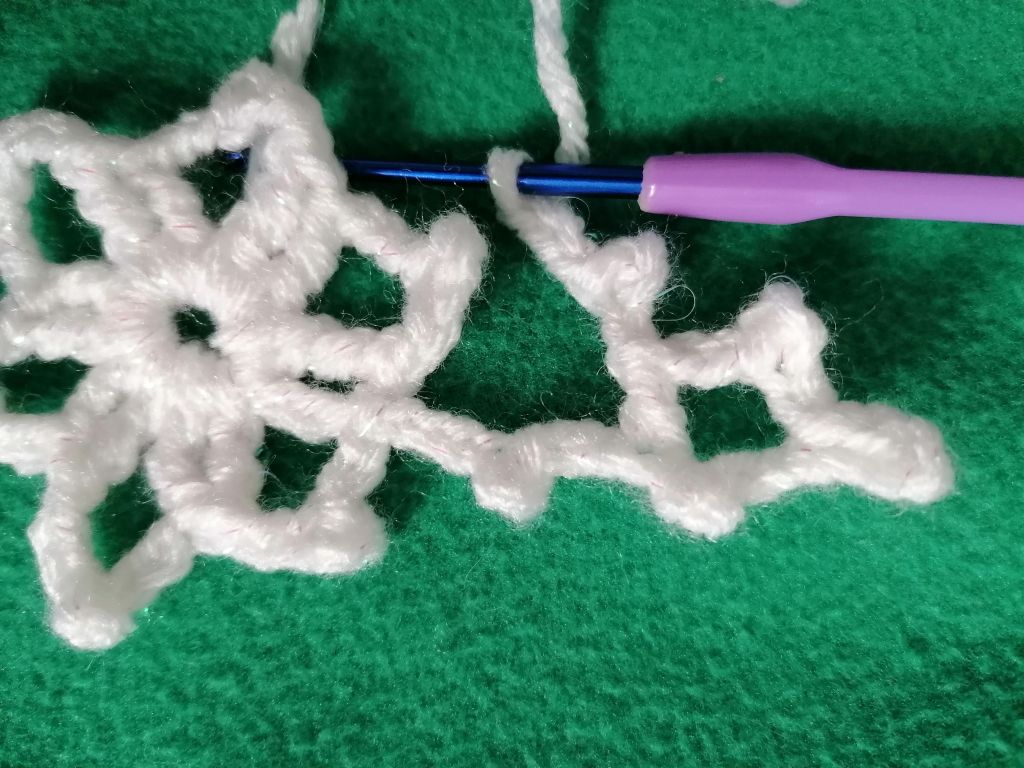
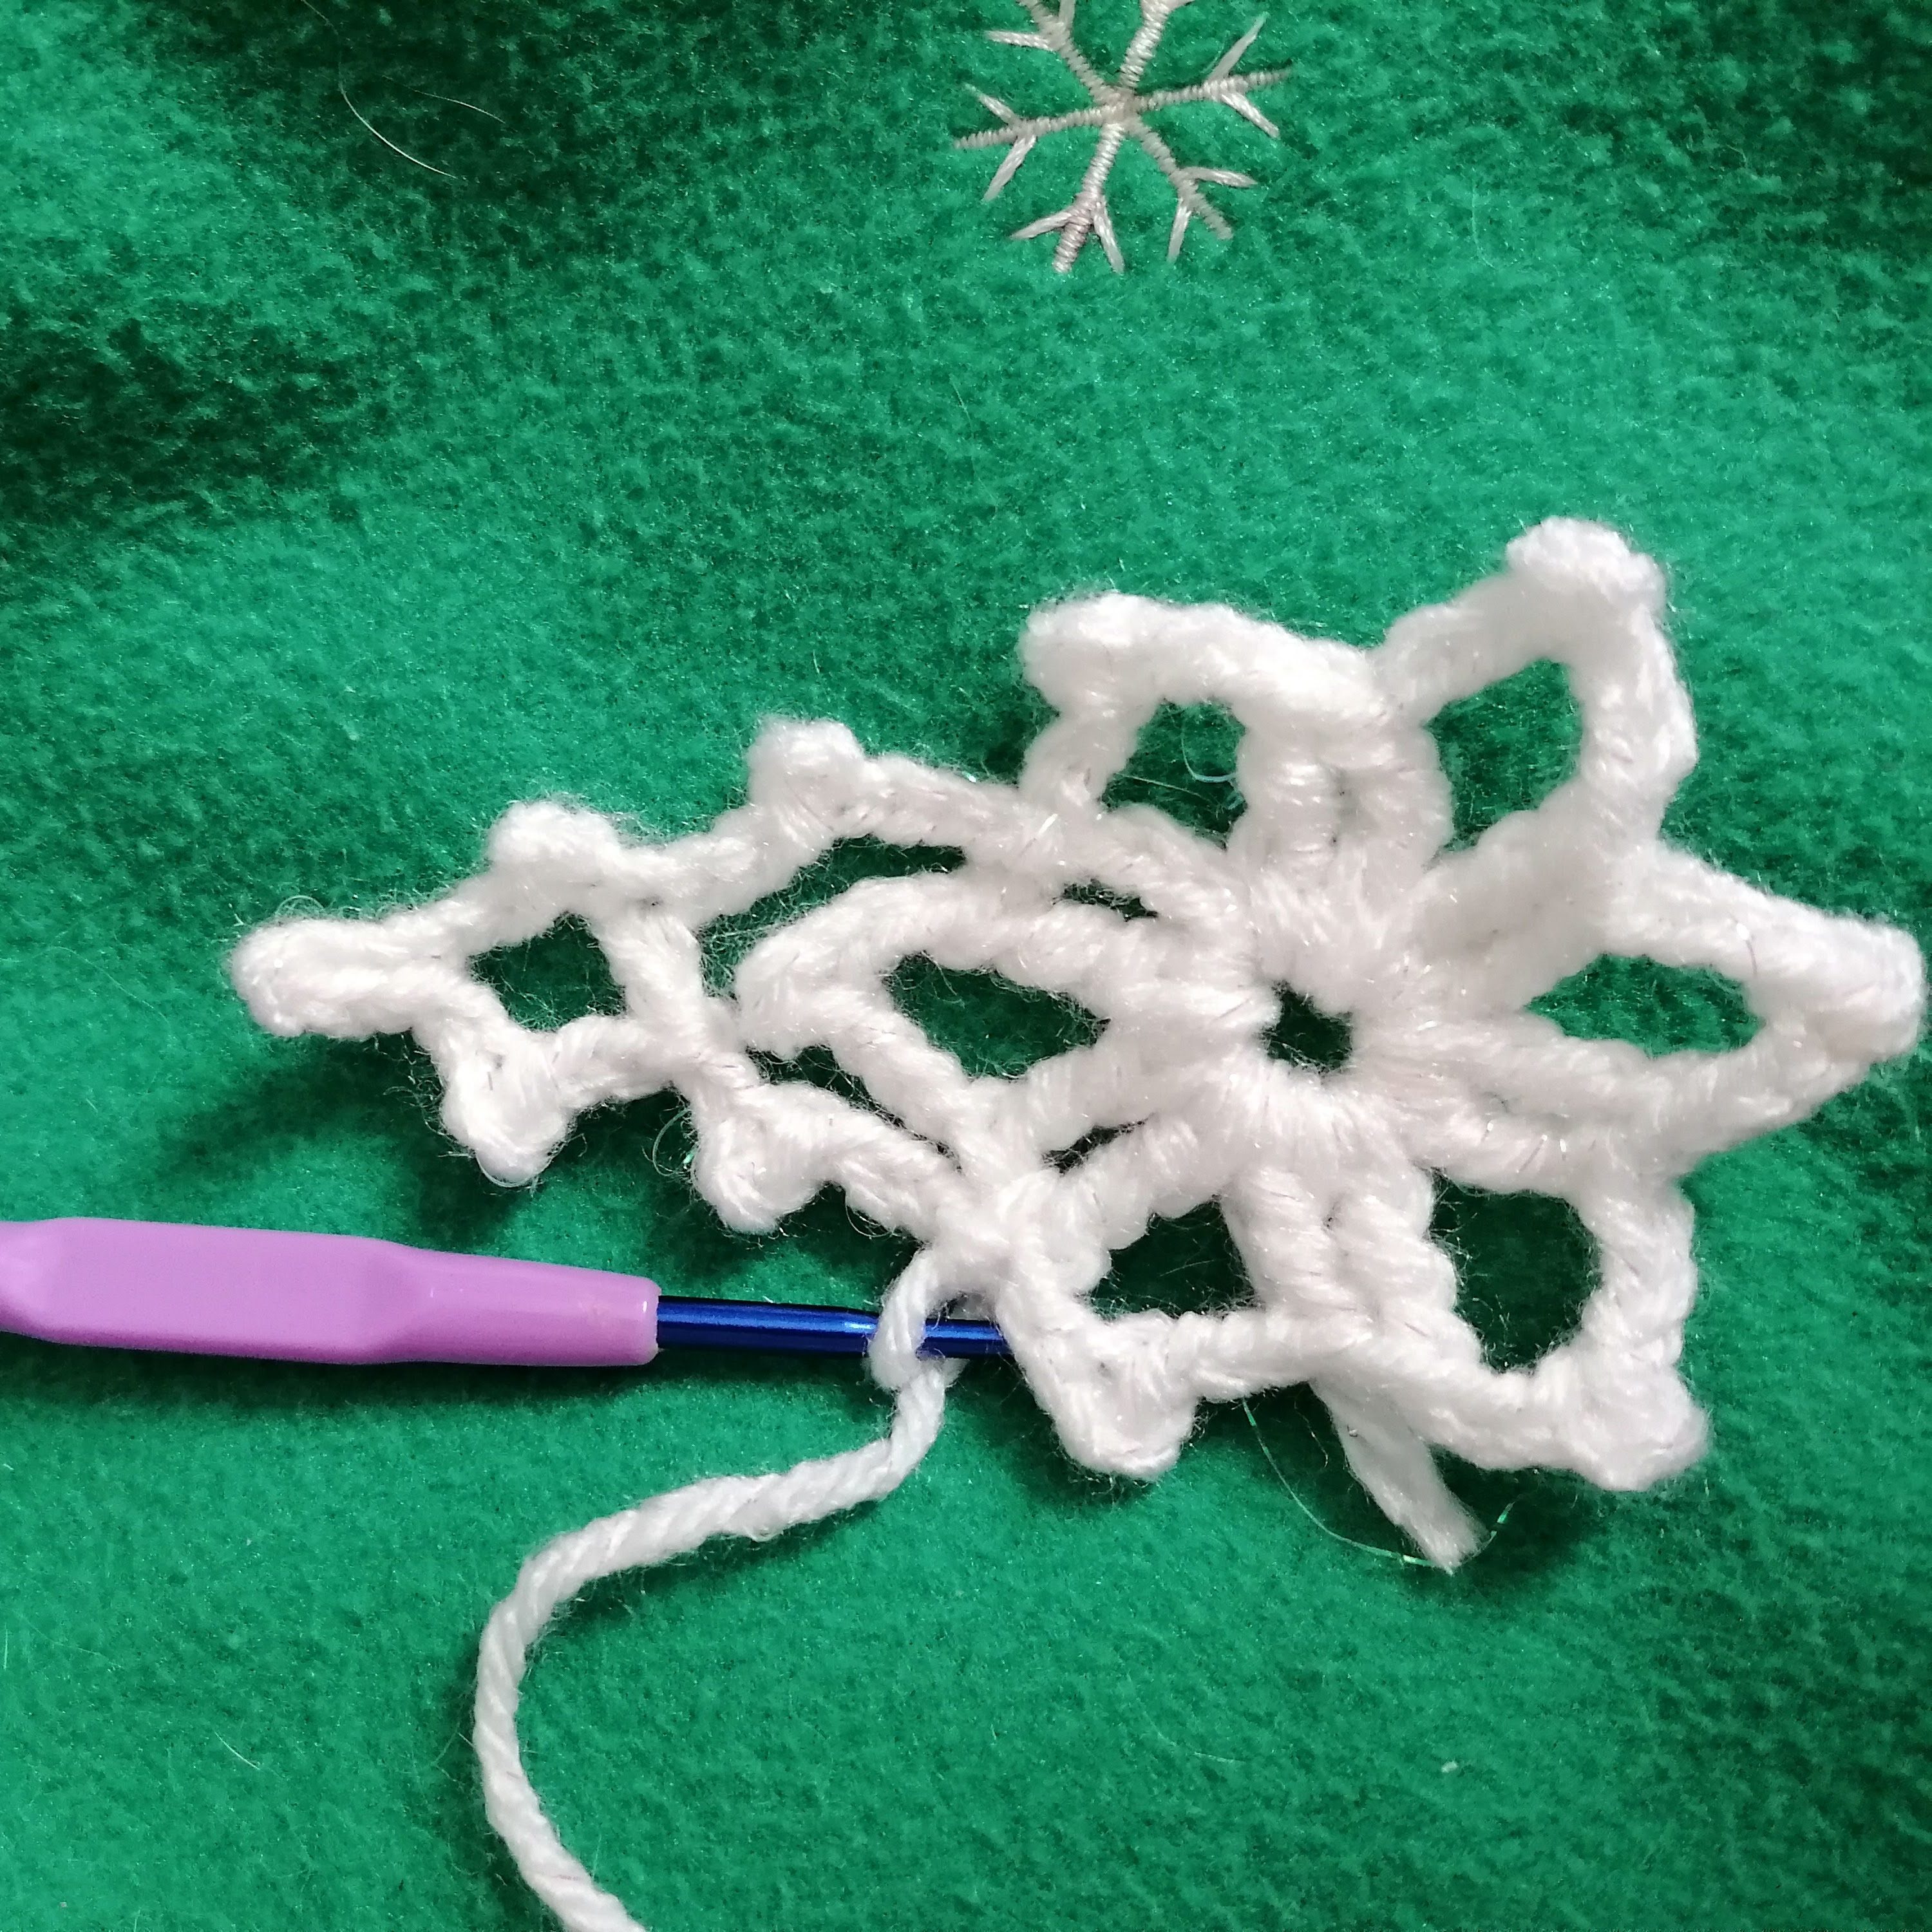
Ch 40, sl st to the base of ch.
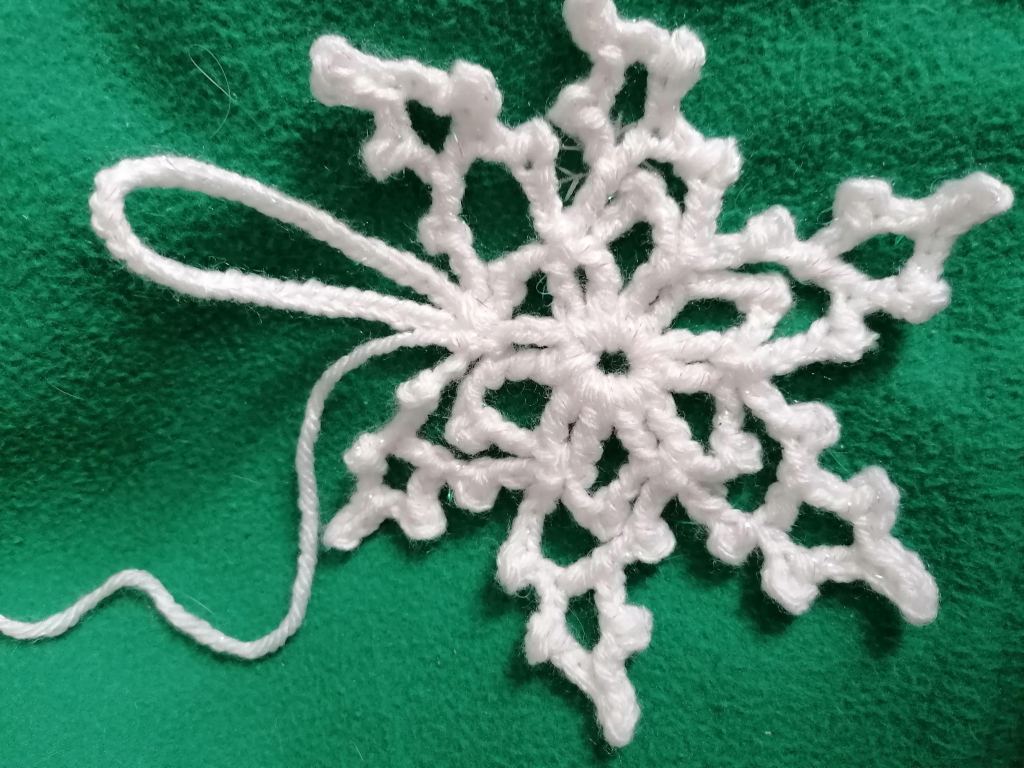
Easy Crochet Snowflakes Free Pattern
I hope you enjoyed making these cute and easy crochet snowflakes. The pattern is so easy and making them is so addictive!
What’s Next?
Pin this post: Save this tutorial to your >>> Pinterest <<< boards so that you can come back to it later.
Leave a comment: We love to hear your feedback. Tell me in the comments below!
Share on Facebook: When you make this project, share it on social media and tag me.
Have questions? Join the Facebook Group! We created this group for you to share pictures, ask questions, and help each other out.
