
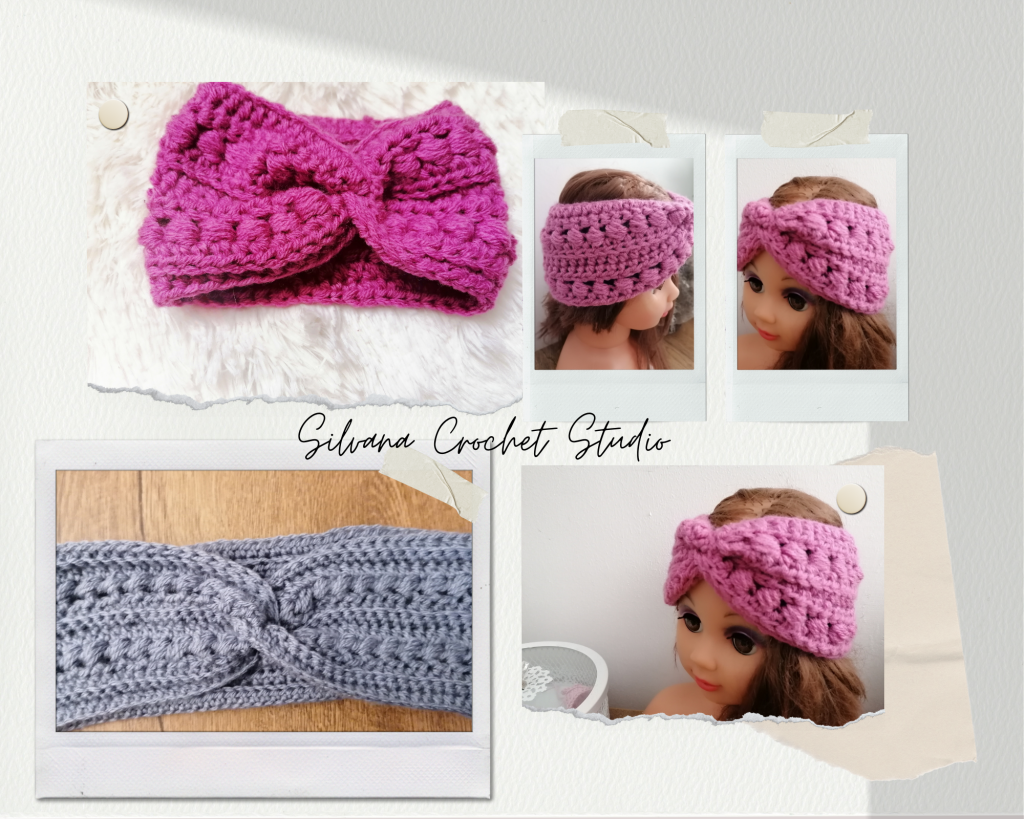
Headband is just enough to keep your ears warm for those like me that don’t particularly like wearing a hat. This headband ear warmer crochet pattern is a great item to make for selling at craft fairs. It is worked flat and then seamed. But don’t worry, I give you picture instructions to create a seam that is practically invisible. Have fun making this great little ear warmer!
This simple crochet headband pattern is easy, fun, and sure to please. You can make ear warmers for yourself, your family, or as gifts for friends and loved ones. These ear warmers not only look great, but are soft and comfortable to wear.
My favorite feature about this crochet headband pattern design is how beautifully the beads line up in rows. The pattern is available in sizes toddler to adult. These will make the perfect stocking stuffers and quick holiday gifts for the whole family and friends.
Get the ADS FREE PATTERN here.
Materials :
- worsted weight yarn (medium #4 weight) Caron One Pound Yarn (Purple) or any worsted weight yarn; (I only used just a bit over 1 oz of yarn for adult size.)
- 5 mm (H) size crochet hook;
- scrissors;
- tapestry needle.

Sizes for the head band ear warmer pattern:
The ear warmer size chart below will help you figure perfect headband size when crocheting. I ussually make a headband about 2 inches smaller than the actual head circumference to allow for stretch. I would recommend using the correct gauge, or stitches per inch, for the proper fit. This is a critical step for this project. If this ear warmer is crocheted too loosely, it will be too big, if the ear warmer it is crocheted too tightly, it will be too small.
Ads Free Pattern Here
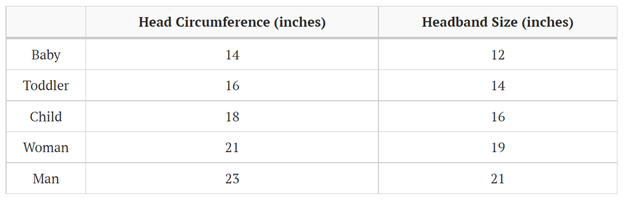
If you are wanting to make crochet headbands ear warmers for adults or an adult size, you will need to measure the circumference of their head first, since the size can vary so much from person to person. This way, you will ensure the crochet headband size fits the person it is intended for making enough foundation chains to fit the headband size.
Terminology
Beg = Beginning
Ch = Chain
Hdc = Half Double Crochet
Rep = Repeat
Sc = Single Crochet
St = Stitch
Sk = Skip
Hdc BLO = Half double crochet back loop only

Special Stitches:
Special Stitches for the headband ear warmer crochet pattern
Half double crochet back loop only instructions: Yarn over and insert hook into next stitch going through the center of the top of the stitch and through the back loop.
Catch the yarn and pull it back through the three loops on your hook.
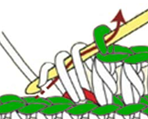
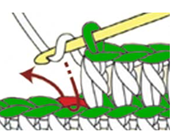
Bead Stitch: to start the Bead Stitch, start by skipping one ST, and placing a intoHDC the next ST (Remember : the ST with the CH2 is my skipped ST). After the HDC is placed, we will work out yarn around this HDC. First, we’ll be placing our hook between the CH2 and HDC. YO and insert your hook to the right side of the HDC. YO and pull up loop. There are 3 loops on the hook. Now, we’ll repeat that process 2 more times. Last, YO and pull through all 7 loops on your hook. To create the Bead Stitch across the row, simply repeat these steps — Sk St, HDC in next ST, BEAD ST around HDC.
Pattern for the woman size (head circumference 21″)
Start by chaining 65.
Row 1: Working in bottom bar of foundation chain, work 2 hdc in the 3rd ch from the hook, then hdc in each chain around
Row 2: ch2, turn, hdc BLO in each stich around working the last hdc from the row in both loops.
Row 3: ch 2, turn, hdc (normal) in the next st, ch1, bead stich around (see the notes above) working the last two stitches of the row as hdc sts.
Row 4: ch 2, turn, work hdc in each st around.

Row 5: ch 2, turn, work hdc BLO in each stich around working the last hdc from the row in both loops.
Row 6: ch 2, turn, work hdc BLO in each stich around working the last hdc from the row in both loops.
Row 7: ch 2, turn, hdc (normal) in the next st, ch1, bead stich around (see the notes above) working the last two stitches of the row as hdc sts.
Row 8: ch 2, turn, work hdc in each st around.
Row 9: ch 2, turn, work hdc BLO in each stich around working the last hdc from the row in both loops.
Row 10: ch 2, turn, work hdc BLO in each stich around working the last hdc from the row in both loops.
Pattern for the BABY size (head circumference 14″)
Start by chaining 40.
Row 1: Working in bottom bar of foundation chain, work 2 hdc in the 3rd ch from the hook, then hdc in each chain around
Row 2: ch2, turn, hdc BLO in each stich around working the last hdc from the row in both loops.
Row 3: ch 2, turn, hdc (normal) in the next st, ch1, bead stich around (see the notes above) working the last two stitches of the row as hdc sts.
Row 4: ch 2, turn, work hdc in each st around.
Row 5: ch 2, turn, work hdc BLO in each stich around working the last hdc from the row in both loops.
Row 6: ch 2, turn, work hdc BLO in each stich around working the last hdc from the row in both loops.
Row 7: ch 2, turn, hdc (normal) in the next st, ch1, bead stich around (see the notes above) working the last two stitches of the row as hdc sts.
Row 8: ch 2, turn, work hdc in each st around.
Row 9: ch 2, turn, work hdc BLO in each stich around working the last hdc from the row in both loops.
Row 10: ch 2, turn, work hdc BLO in each stich around working the last hdc from the row in both loops.
Pattern for the TODDLER size (head circumference 16″)
Start by chaining 46.
Row 1: Working in bottom bar of foundation chain, work 2 hdc in the 3rd ch from the hook, then hdc in each chain around
Row 2: ch2, turn, hdc BLO in each stich around working the last hdc from the row in both loops.
Row 3: ch 2, turn, hdc (normal) in the next st, ch1, bead stich around (see the notes above) working the last two stitches of the row as hdc sts.
Row 4: ch 2, turn, work hdc in each st around.
Row 5: ch 2, turn, work hdc BLO in each stich around working the last hdc from the row in both loops.
Row 6: ch 2, turn, work hdc BLO in each stich around working the last hdc from the row in both loops.
Row 7: ch 2, turn, hdc (normal) in the next st, ch1, bead stich around (see the notes above) working the last two stitches of the row as hdc sts.
Row 8: ch 2, turn, work hdc in each st around.
Row 9: ch 2, turn, work hdc BLO in each stich around working the last hdc from the row in both loops.
Row 10: ch 2, turn, work hdc BLO in each stich around working the last hdc from the row in both loops.
Pattern for the CHILD size (head circumference 18″)
Start by chaining 53.
Row 1: Working in bottom bar of foundation chain, work 2 hdc in the 3rd ch from the hook, then hdc in each chain around
Row 2: ch2, turn, hdc BLO in each stich around working the last hdc from the row in both loops.
Row 3: ch 2, turn, hdc (normal) in the next st, ch1, bead stich around (see the notes above) working the last two stitches of the row as hdc sts.
Row 4: ch 2, turn, work hdc in each st around.
Row 5: ch 2, turn, work hdc BLO in each stich around working the last hdc from the row in both loops.
Row 6: ch 2, turn, work hdc BLO in each stich around working the last hdc from the row in both loops.
Row 7: ch 2, turn, hdc (normal) in the next st, ch1, bead stich around (see the notes above) working the last two stitches of the row as hdc sts.
Row 8: ch 2, turn, work hdc in each st around.
Row 9: ch 2, turn, work hdc BLO in each stich around working the last hdc from the row in both loops.
Row 10: ch 2, turn, work hdc BLO in each stich around working the last hdc from the row in both loops.
Pattern for the woman LARGE/MAN size (head circumference 23″)
Start by chaining 70.
Row 1: Working in bottom bar of foundation chain, work 2 hdc in the 3rd ch from the hook, then hdc in each chain around
Row 2: ch2, turn, hdc BLO in each stich around working the last hdc from the row in both loops.
Row 3: ch 2, turn, hdc (normal) in the next st, ch1, bead stich around (see the notes above) working the last two stitches of the row as hdc sts.
Row 4: ch 2, turn, work hdc in each st around.
Row 5: ch 2, turn, work hdc BLO in each stich around working the last hdc from the row in both loops.
Row 6: ch 2, turn, work hdc BLO in each stich around working the last hdc from the row in both loops.
Row 7: ch 2, turn, hdc (normal) in the next st, ch1, bead stich around (see the notes above) working the last two stitches of the row as hdc sts.
Row 8: ch 2, turn, work hdc in each st around.
Row 9: ch 2, turn, work hdc BLO in each stich around working the last hdc from the row in both loops.
Row 10: ch 2, turn, work hdc BLO in each stich around working the last hdc from the row in both loops.
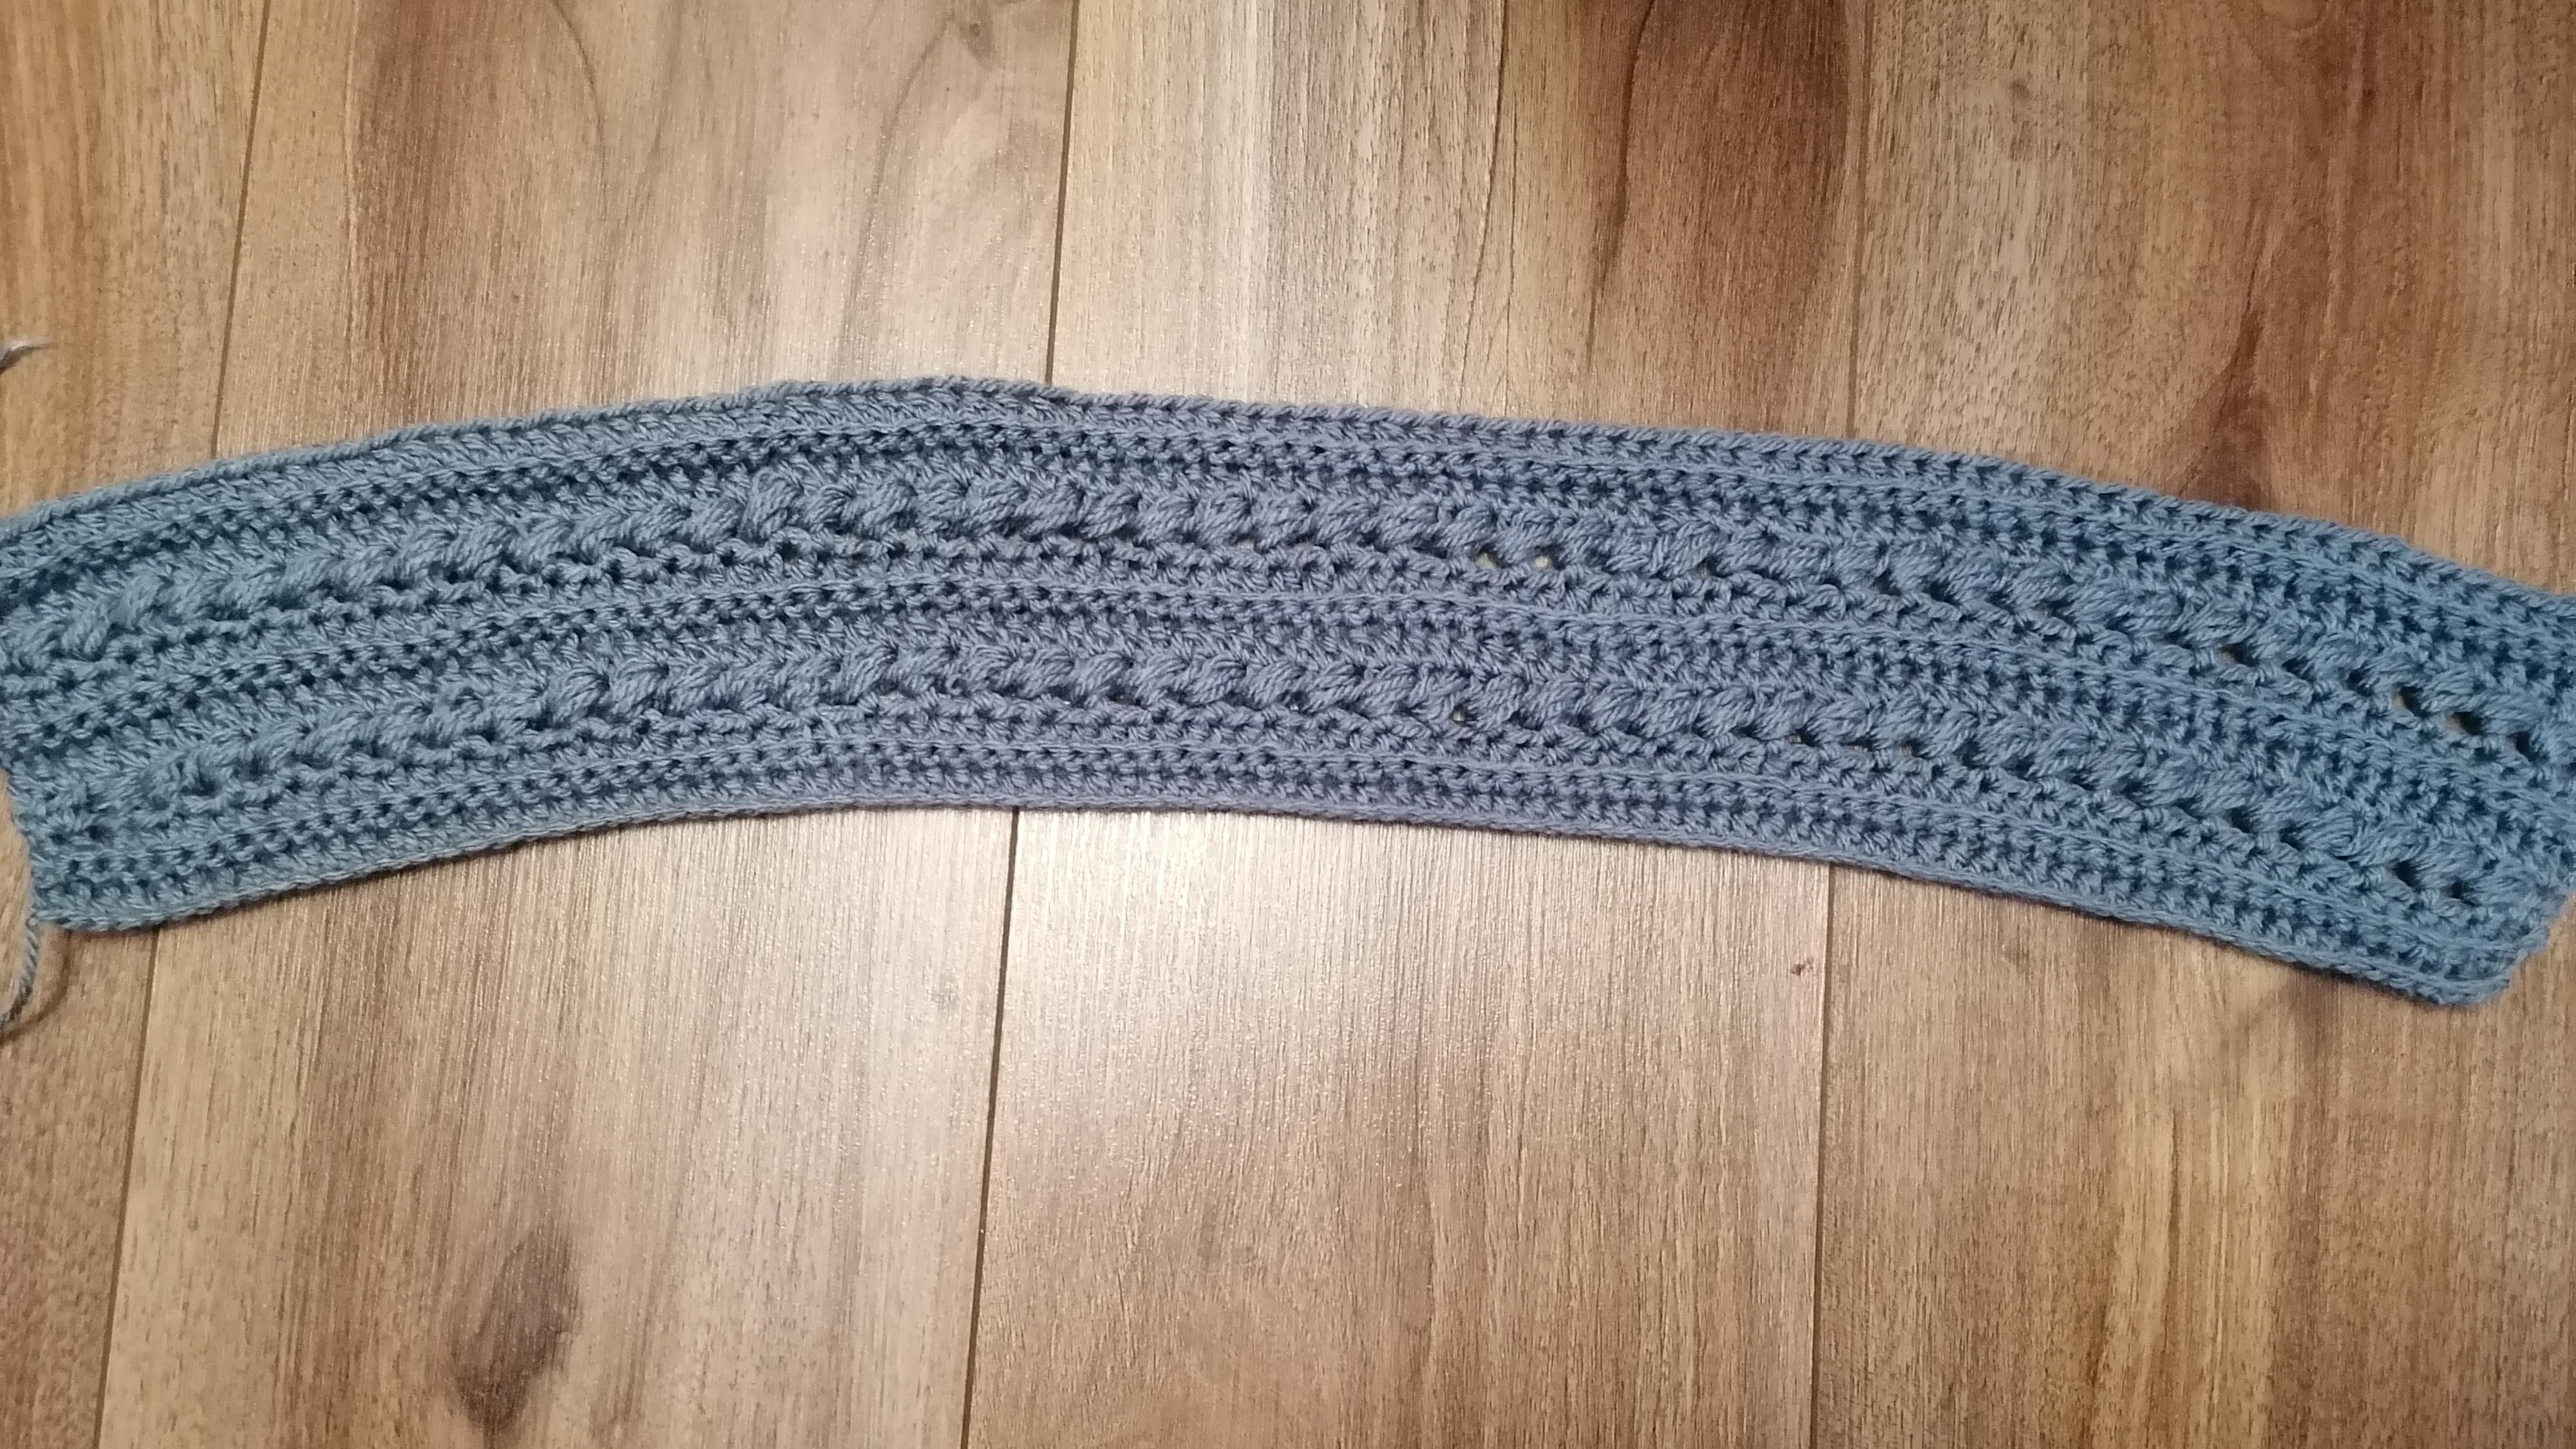
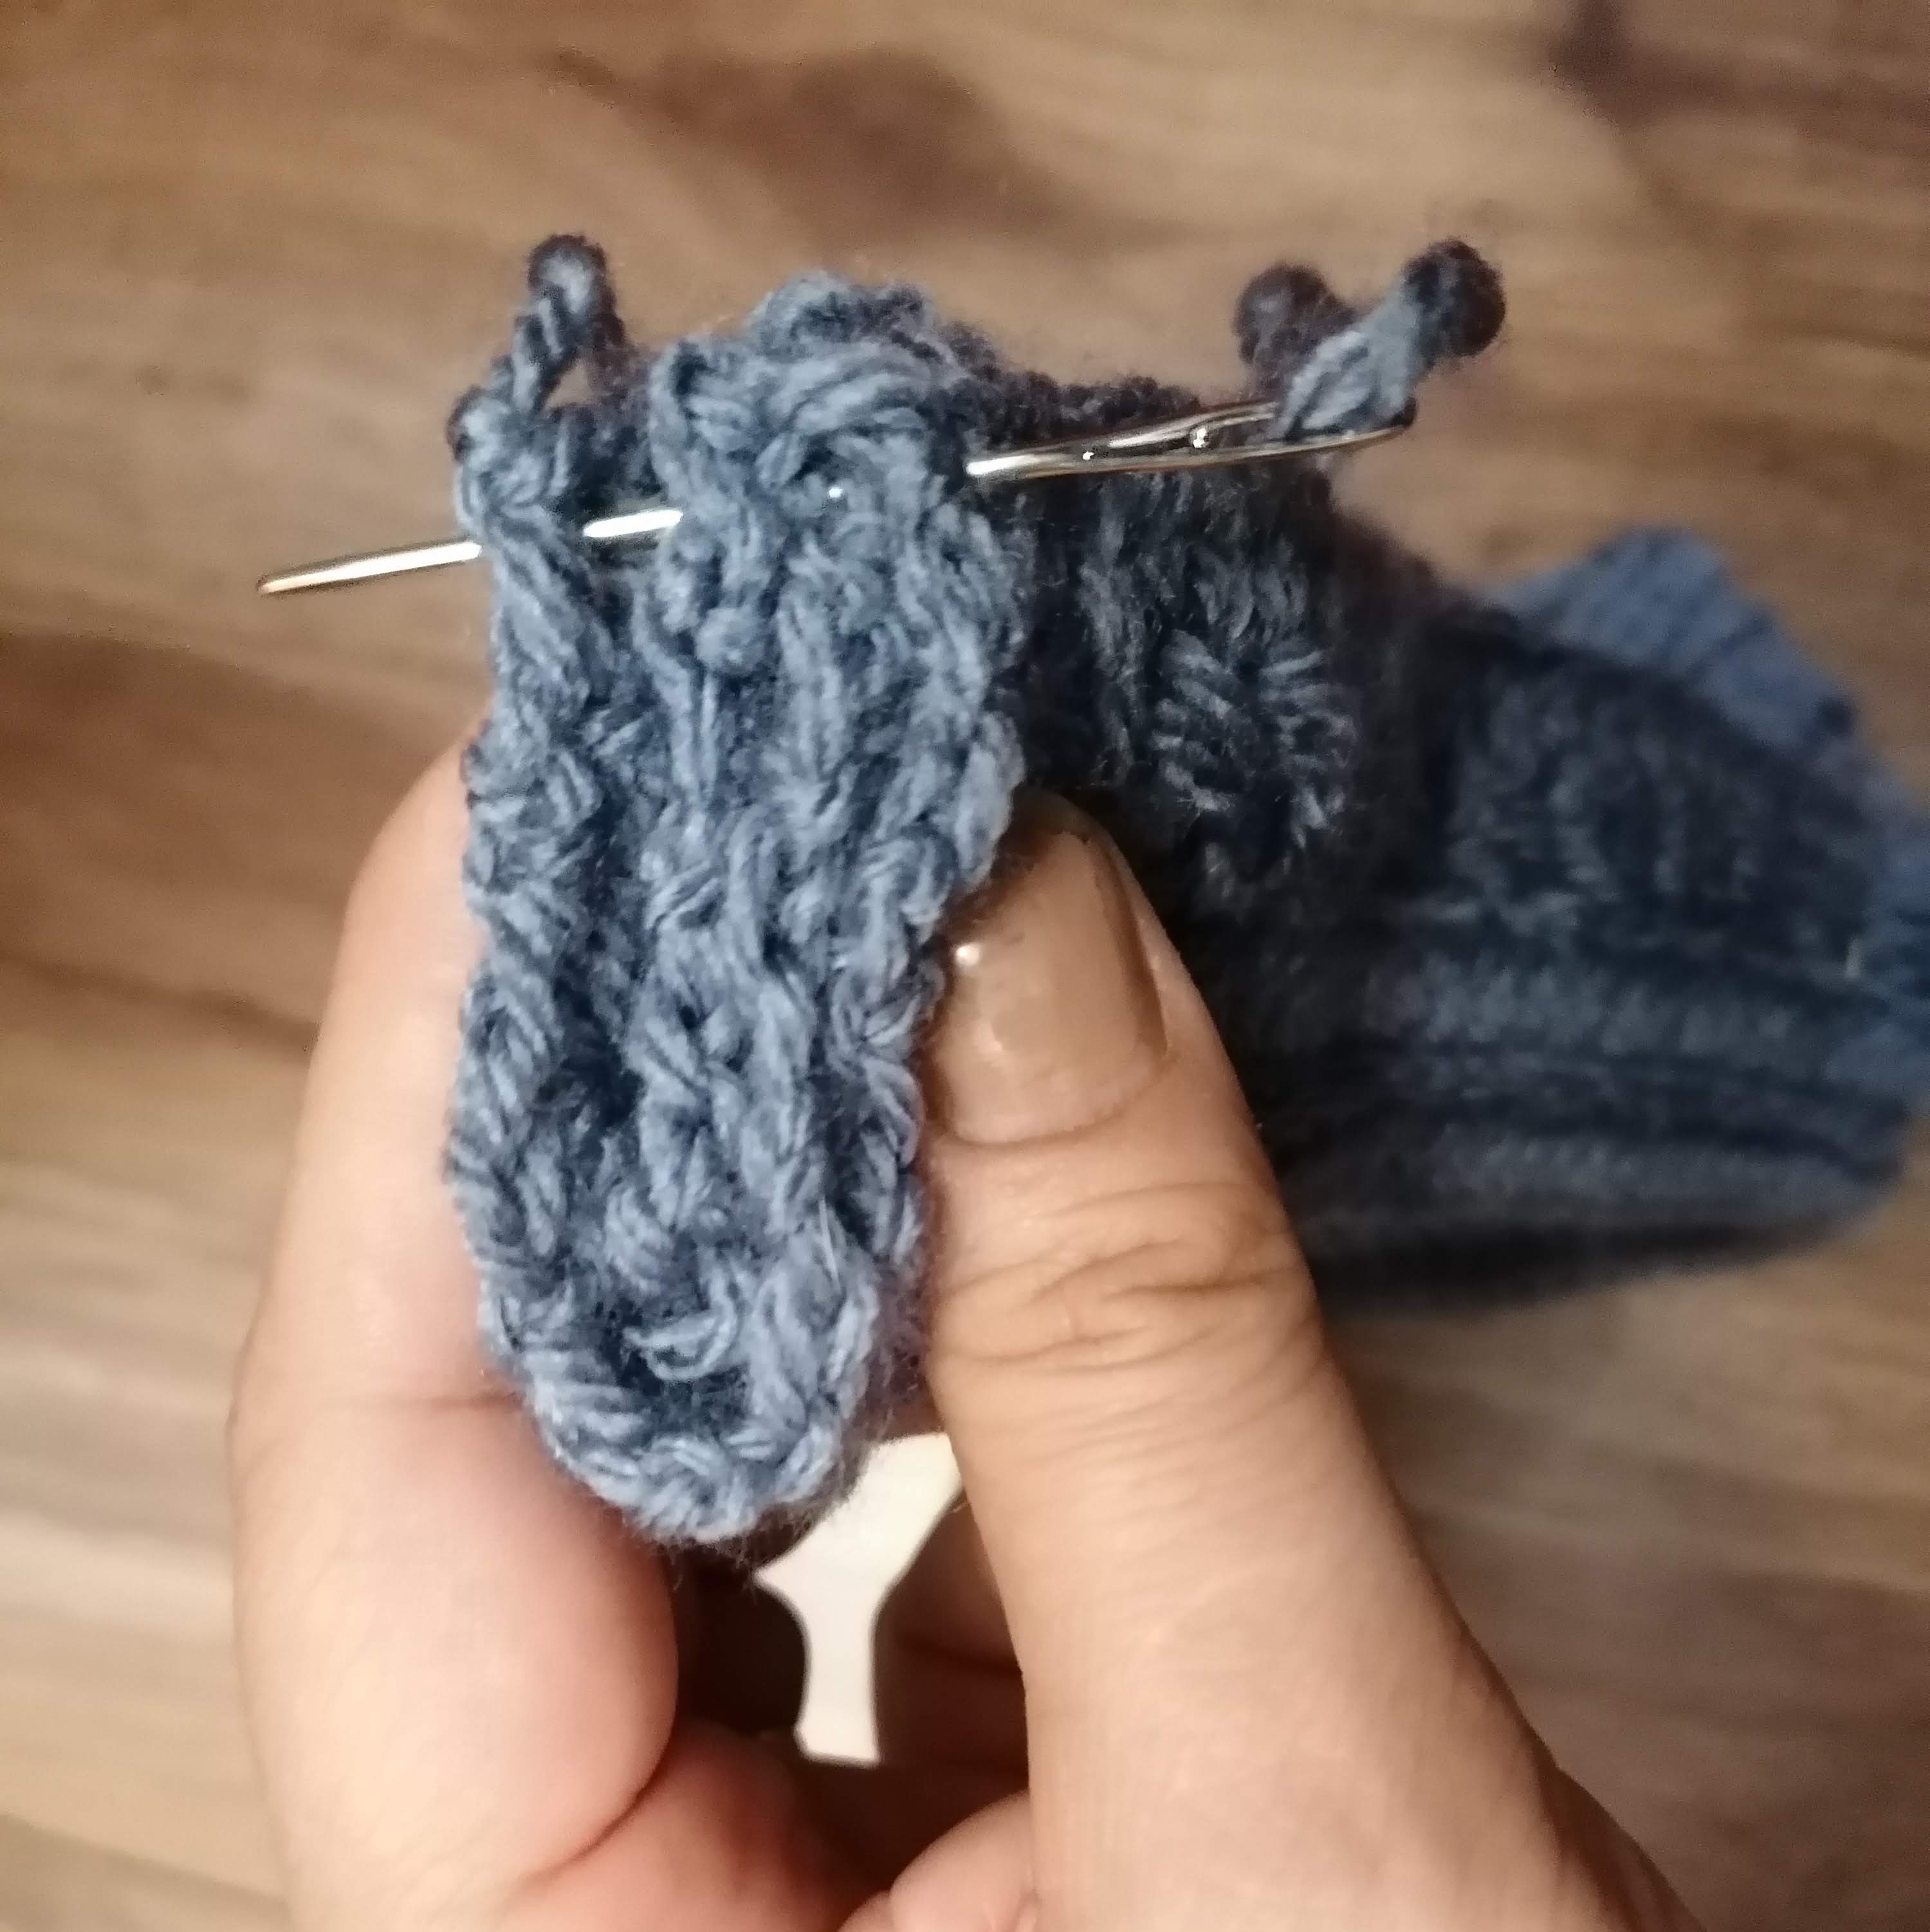
Finishing the headband ear warmer
Lay flat with right side up. The right side is the side you started your chain on. (see picture!)
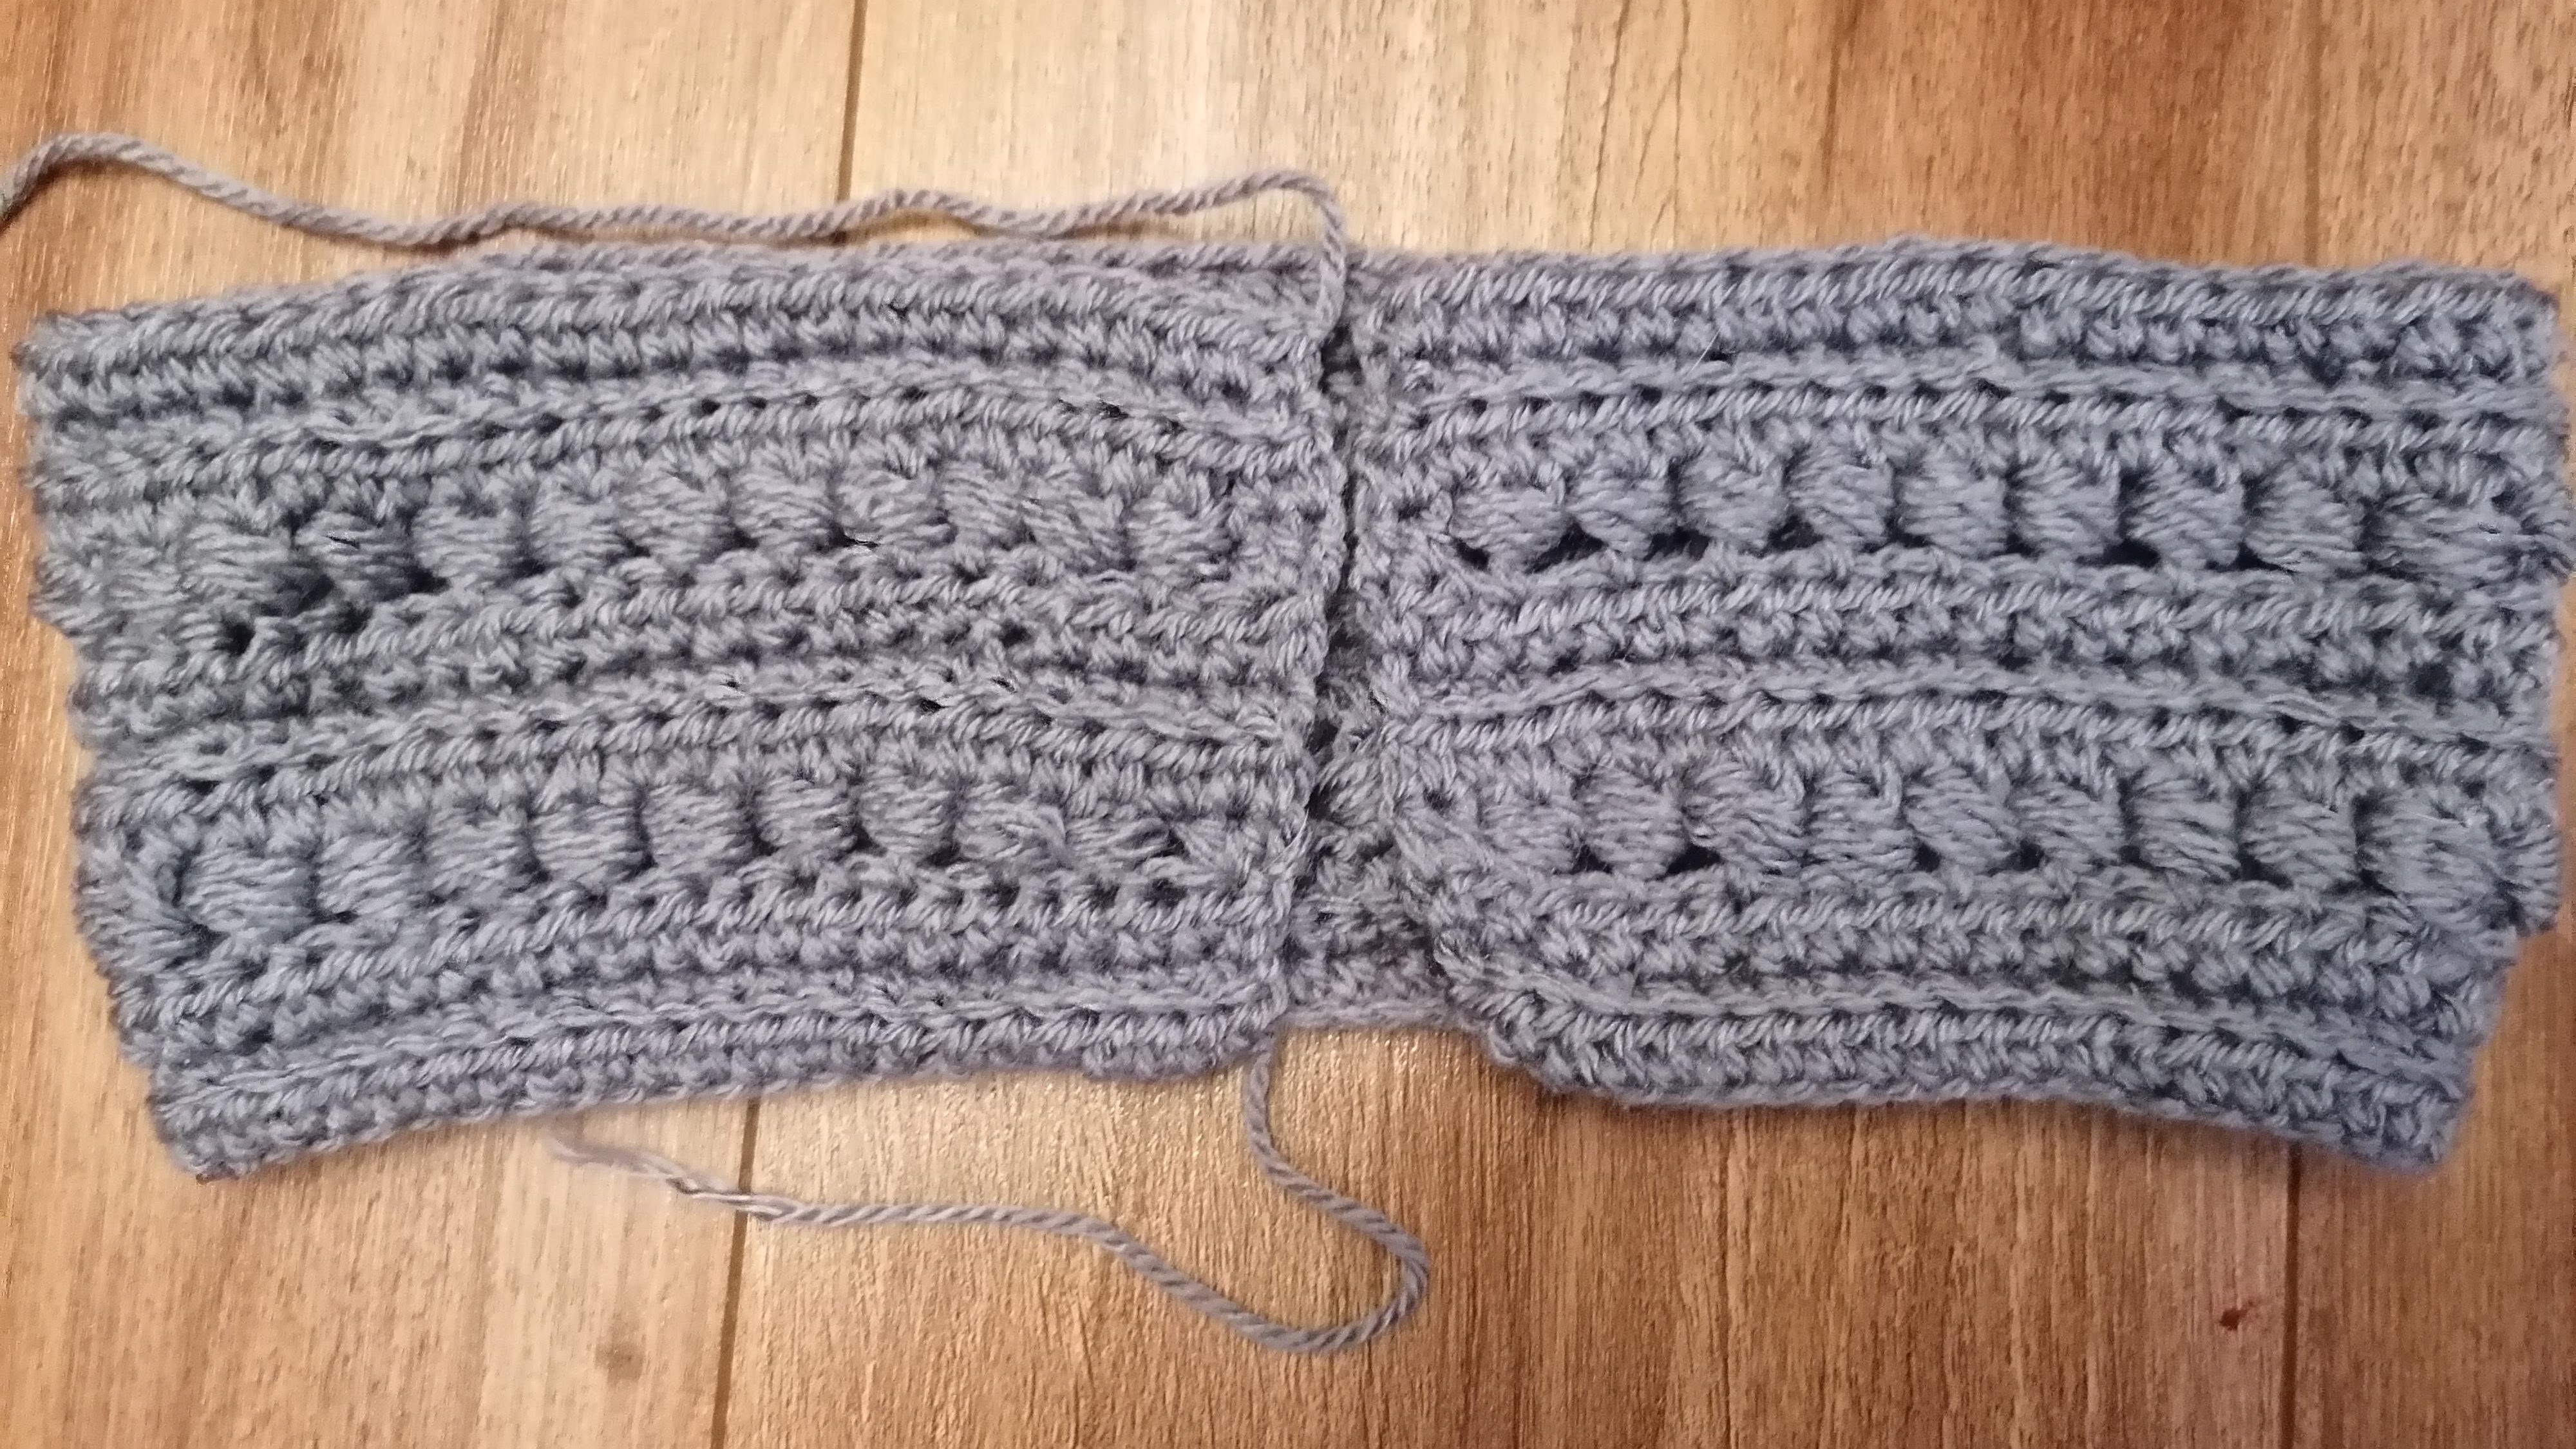
Fold the two short ends together on each side, bring the two folded ends together. (see picture!)
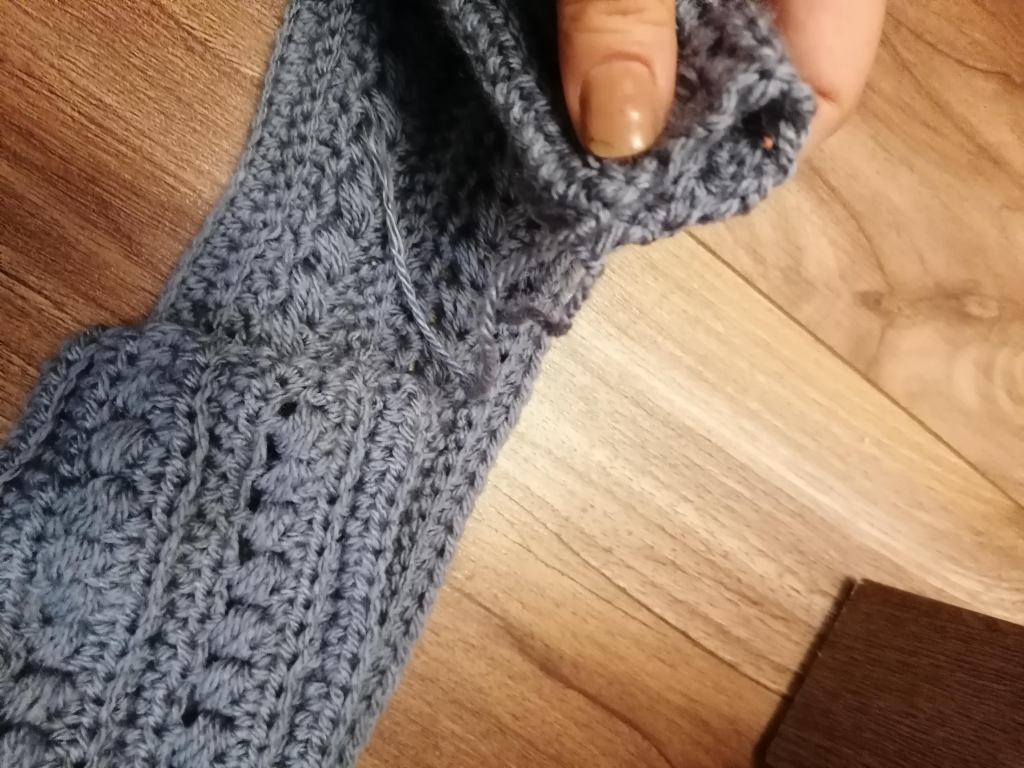

Attach yarn to the yarn needle, sew back and forth making sure to go through all four ends.
Fasten off yarn and weave in loose ends securely.
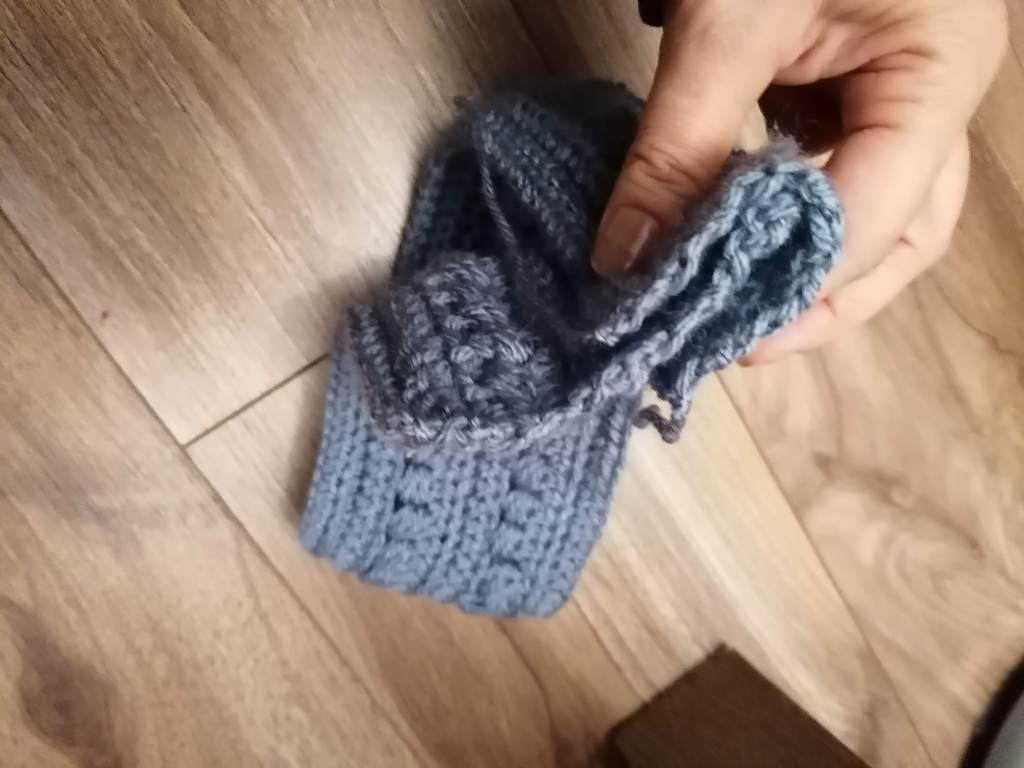
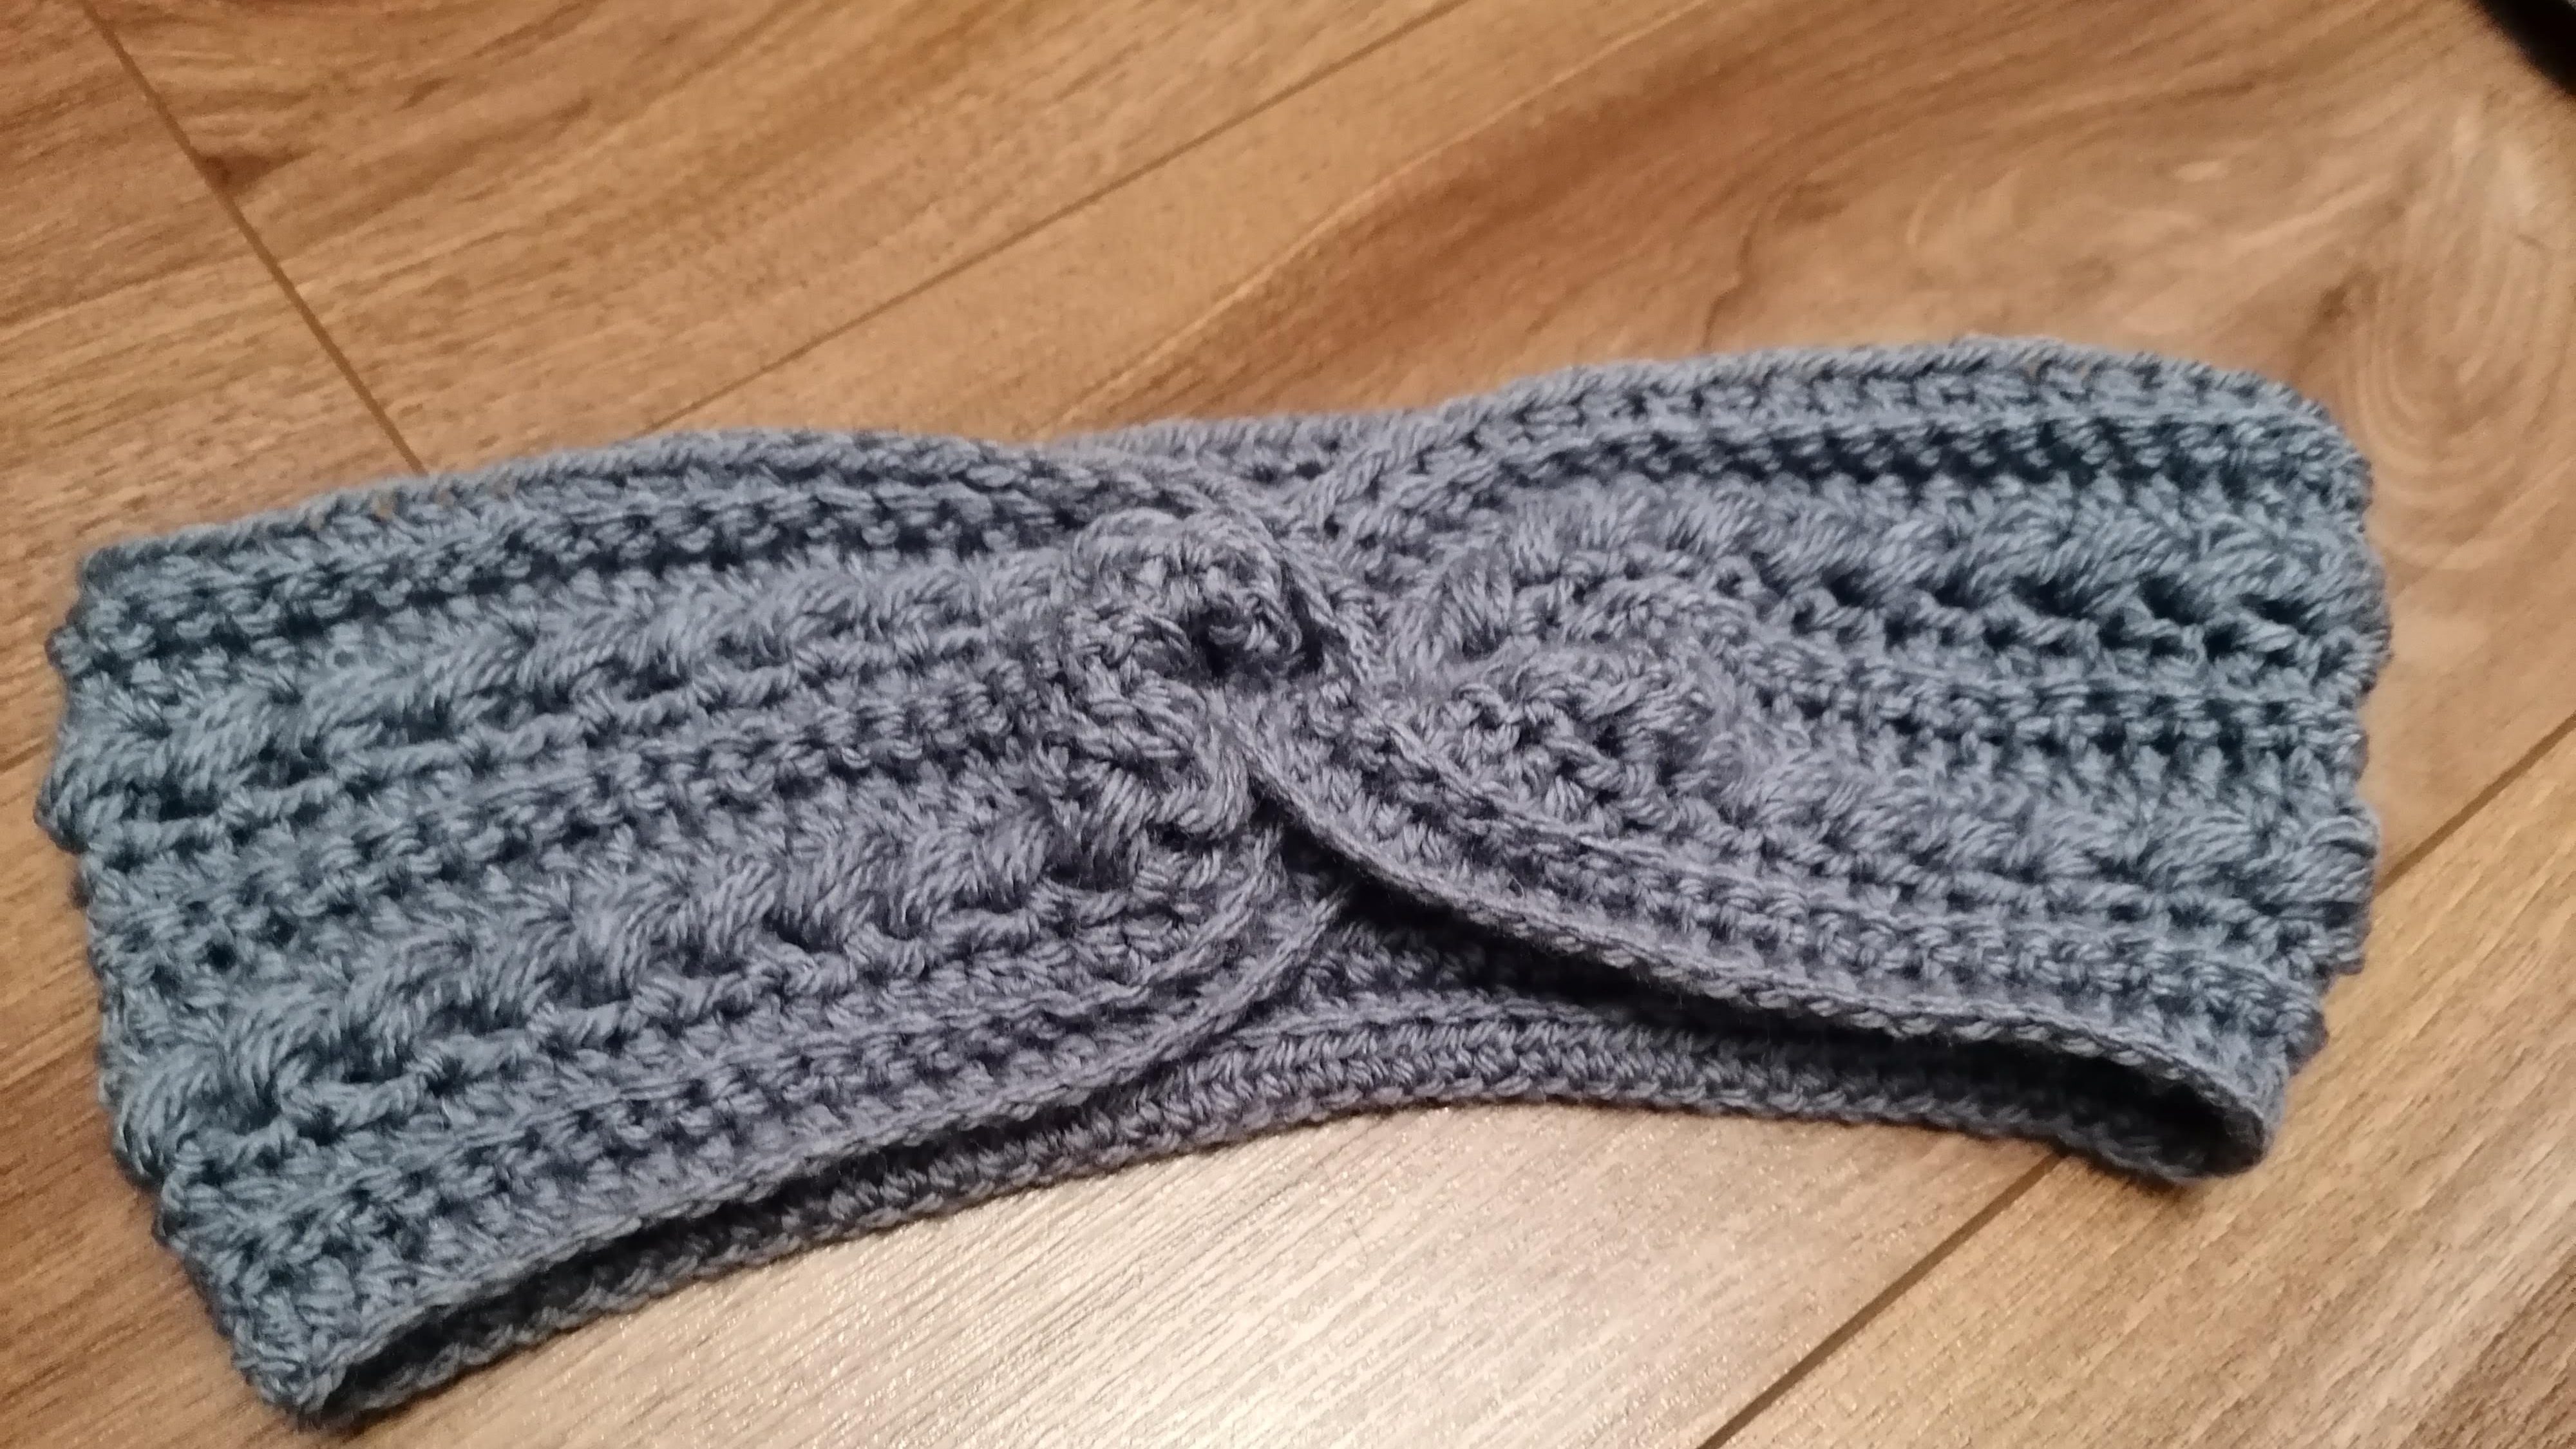
Flip the headband inside out so the right side is showing again to see your new headband creation.
I hope you enjoyed this beautiful ear warmer pattern. For more beautiful creations please subscribe bellow!
Happy Crocheting!
