
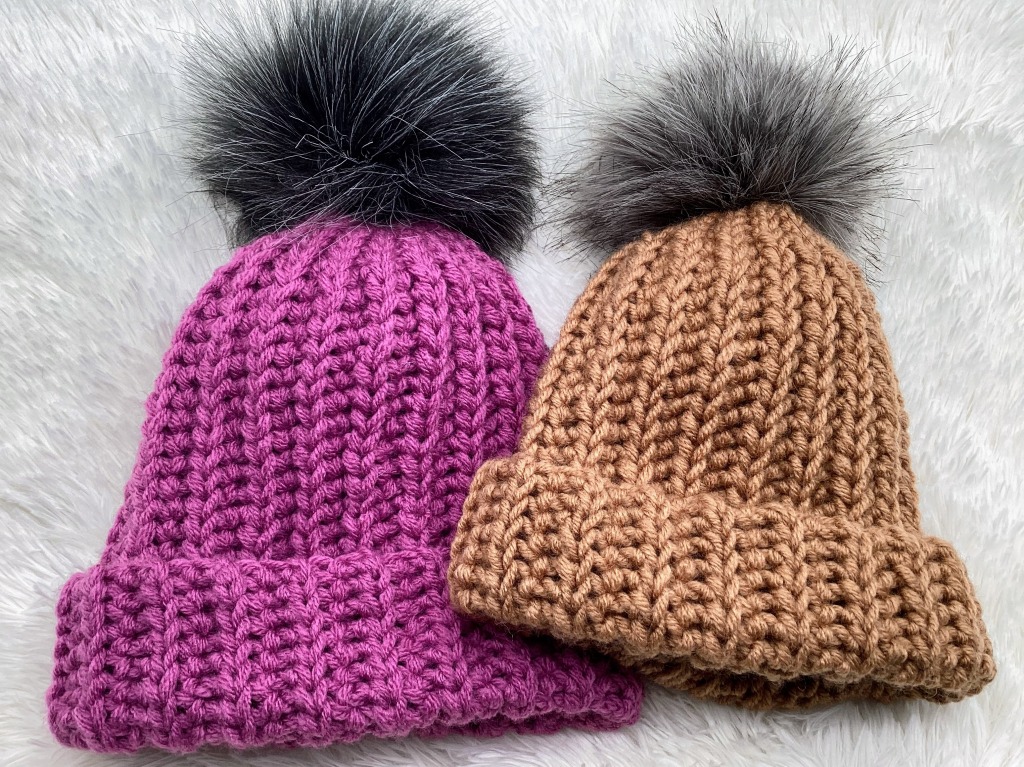
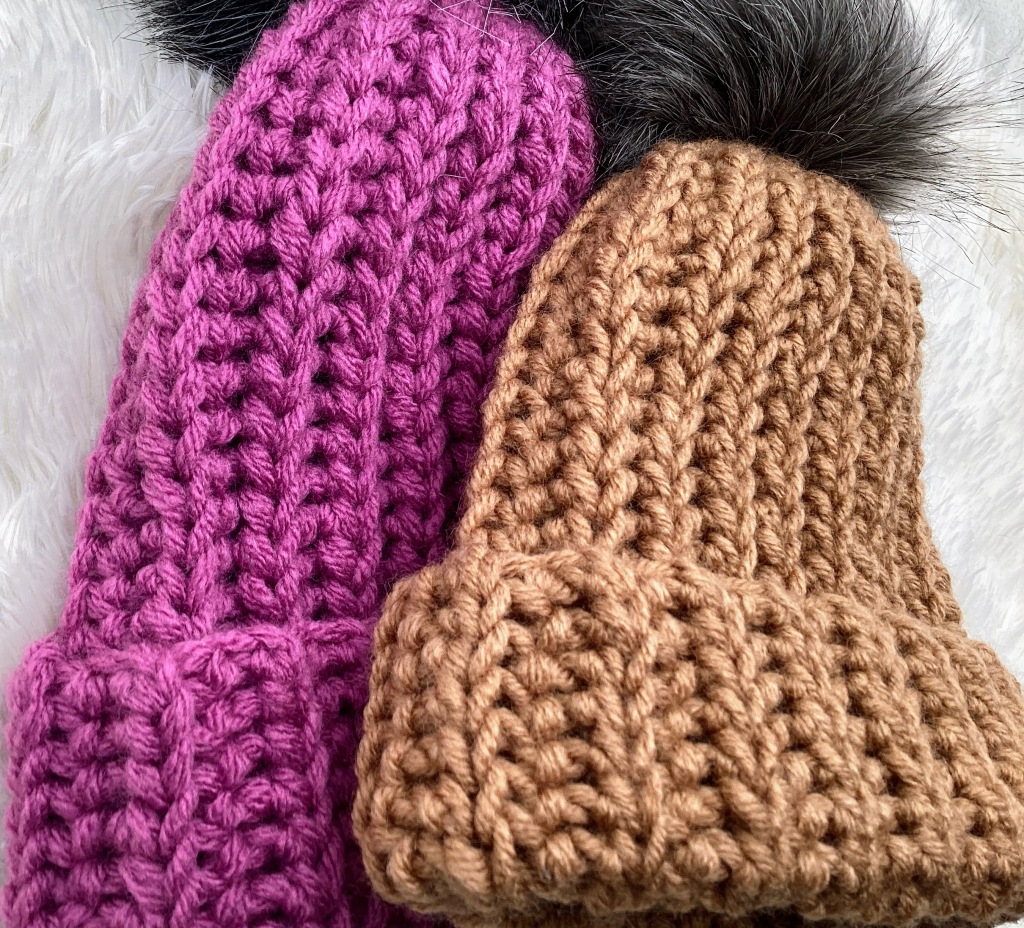
One of my favorite crochet patterns to make and design is hats and beanies, beacuse crocheted hats and beanies can be made in so many different ways.
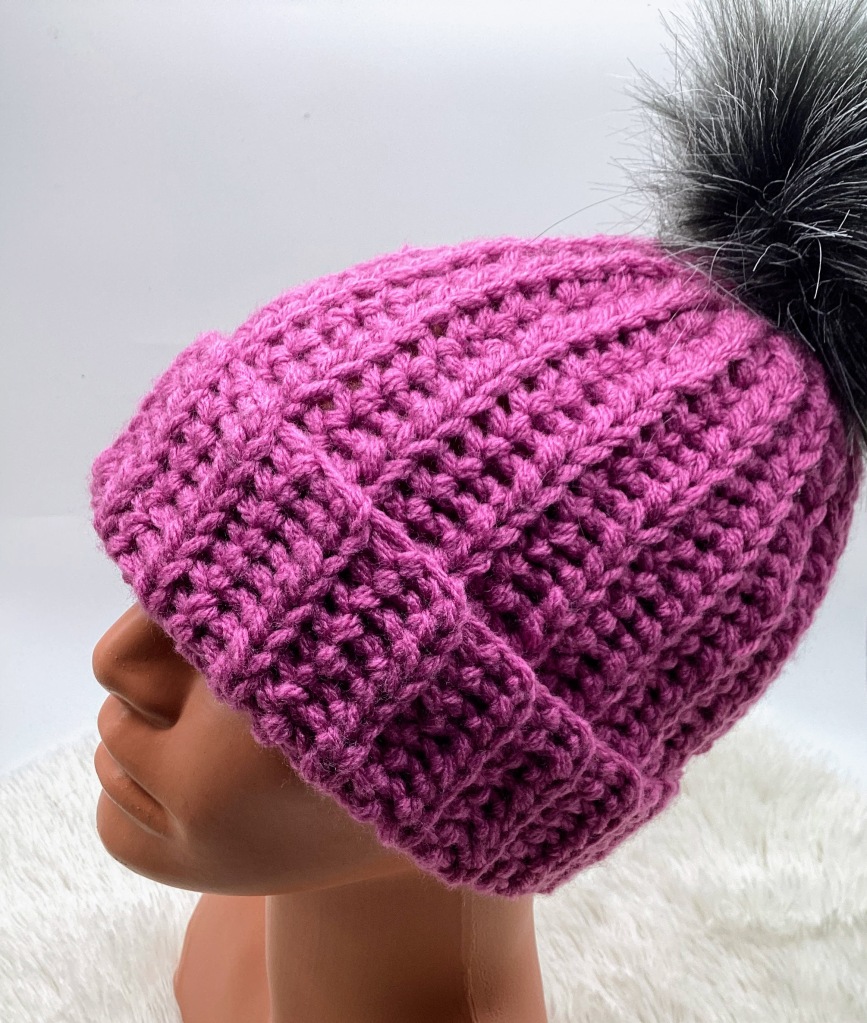
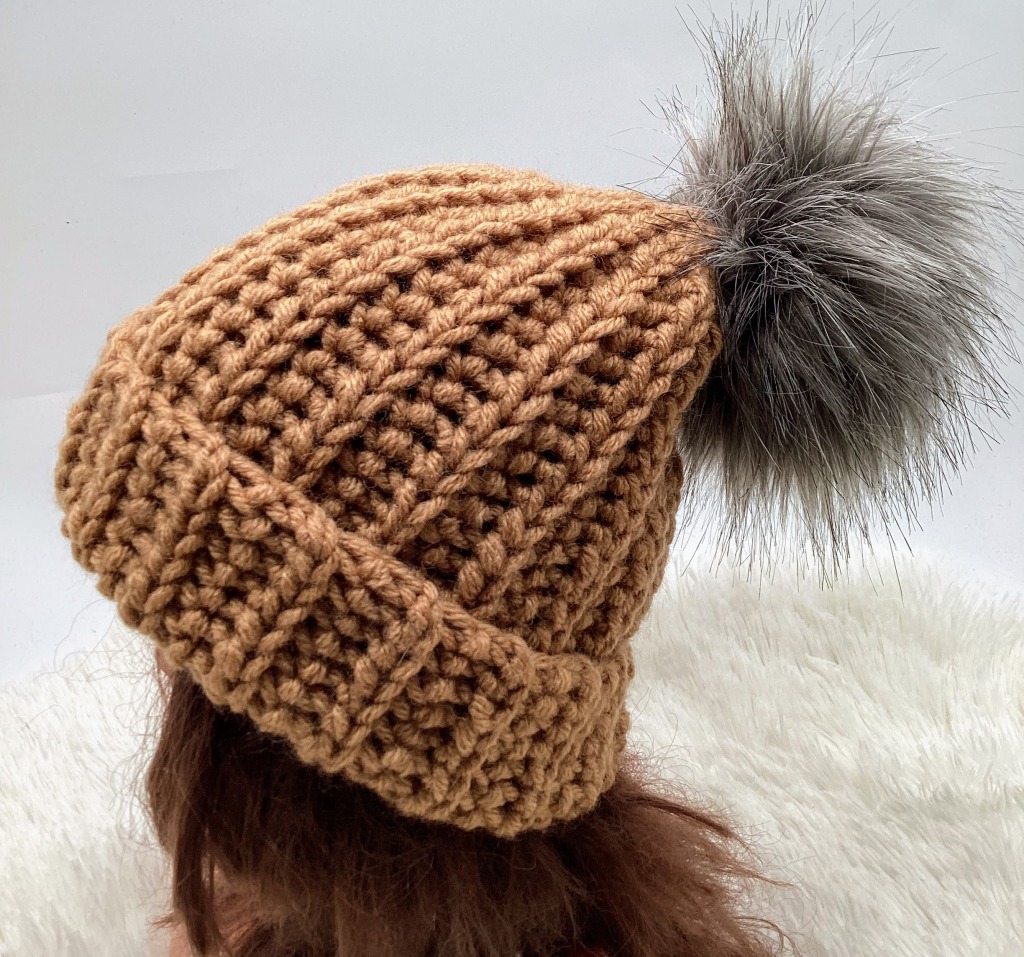
This beginner-friendly hat is crocheted in a simple stitch that looks like knitting! This pattern is made using only slip stitch and half double crochet slip stitch crochet stitches. Made from a rectangle, it’s a quick and easy hat that can be made in LESS THAN 2 HOURS!
This pattern is also available as an ad-free, printer-friendly pdf pattern that can be purchased at the links below for only a small fee.
THIS CROCHET PATTERN FOR ALL SIZES IS FREE TO VIEW ONLINE BELOW. YOU ALSO HAVE THE OPTION TO PURCHASE THE AD-FREE PDF DOWNLOAD VERSION for a small fee. THIS INCLUDES EXTRA HIGH QUALITY, STEP BY STEP, PHOTOGRAPHS THROUGHOUT AND IN-DEPTH TUTORIAL. CLICK HERE TO GET THE PDF VERSION: ETSY AND RAVERLY
It’s the easiest way to crochet a hat and you can easily change the size by referencing the measurement of the table below. That even allows you to change the yarn weight and still use this pattern.
Materials Needed for Crochet Hat Pattern
This hat pattern calls for between 40 and 100 yards of bulky weight yarn, depending on the size you are making.
More Crochet Patterns
If you like this crochet hat, you might also enjoy these other free crochet accessory pattern:
In this post you will find:
Skill level required for this pattern
Materials needed to make the knit-look beanie
Notes about the crochet pattern
Terminology and Crochet Stitch Abbreviation
Special Crochet Stitches Used in This Pattern
Gauge for the Crochet Pattern
Crochet Pattern for Baby Size 6 months and older
Joining the Hat
Free Crochet Pattern for Toddler Size
Free Crochet Pattern for Child Size
Free Crochet Pattern for Teen Size
Free Crochet Pattern for Women Size
Free Crochet Pattern for Adult Large Size
Free Get the Ads-Free Version PDF for the Crochet Hat

Skill level: Advanced Beginner
Materials needed to make the beanie
Approx Bulky Yarn (I used Superlana Maxi from Alize 109 yards (100 meters)/ 100 grams (3.53 ounces))
7 mm crochet hook
Pom pom (additional)
Scrissors
Tape measurement
Stitch marker
Don’t like Ads???
GET THE AD-FREE PDF VERSION. THIS INCLU FOR A SMALL FEE. THIS INCLUDES EXTRA HIGH QUALITY, STEP BY STEP, PHOTOGRAPHS THROUGHOUT AND IN-DEPTH TUTORIAL. CLICK HERE TO GET THE PDF VERSION: ETSY AND RAVERLY
!!!!!Check out the sale on Etsy for this pattern only for this week!!!
Notes for this crochet pattern
- The hat has a flat construction, worked in one panel, in rows with bulky yarn (5) and sewn together at the end.
- The initial chain of this pattern (foundation chain) will be the height of the hat pattern and the rows worked will be the width.
- I recommend reading through the pattern and doing a gauge swatch before starting.
- The beginning chains of the rows do not count as the first stitch of the row.
- Follow along with gauge + hat size chart for a perfectly fitted crochet hat.
- Try to maintain a really loose tension when crocheting, it should be very easy to work into each sl st.
- The pattern is a repeat of one main row.
- The hat has extra length to allow you to fold up the brim once finished.
- Hat is designed with negative ease, meaning the hat is a little smaller than the wearer’s head circumference, so it will stretch to comfortably stay on the head.
Abbreviation and terminology used in the pattern
Abbreviations:
st: stitch
sts: stitches
ch: chain
yo: yarn over
sl st: slip stitch
*hdcslst: half double crochet slip stitch
blo: back loop only
*This is a special stitch. See instructions below to learn how to work this stitch.
Crochet Stitches Used in this Pattern
Special stitches:
Slip Stitch (sl st): Insert hook into designated stitch, yo (yarn over) and pull back through the st and through the loop on the hook.
Half Double Slip Stitch(hdcslst – also called Yarn Over Slip Stitch): this stitch combines two stitches (the half double crochet and the slip stitch) to creat a beautiful texture. Yo, insert hook into indicated st, yo and draw up a loop.
Then pull that same loop you just drew up through both loops on your hook to complete the stitch.
Pulling that initial loop through the other loops on your hook can be a bit tricky at first. I like to pull the loop up, then hold the stitch I inserted my hook through steady while I draw the loop through. Once you get the hang it, it works up fast.
Half Double Slip Stitch Back Loop Only – it is worked the same like the half double slip stitch except the fact that it is worked only in the back loop of each stitch. To crochet in the back loop of a stitch, insert your crochet hook underneath the back loop only and make the stitch as indicated in the pattern
Gauge: 11 hdcsls x 9 rows = 4”x 4” (10 cm x 10 cm)

Crochet Pattern for baby size 6 months and older (includes 1.5” brim): 14” circumference and 7,5” height
Pattern for baby size 6 months and older (includes 1.5” brim): 14” circumference and 7,5” height
Chain 22
Row 1: hdslst in the second chain from the hook, hdcslst in each of the next 17 chains, sl st in each next 3 sts. Chain 1 and turn. (18 hdcslst, 3 sl sts)
Starting row 2, every stitch in this pattern wil be owrked in the bacl loop only (blo).
Row 2: sl st blo in each of the first 3 sts, hdcslst blo in the next 18 sts. Chain 1 and turn. (3 sl sts, 18 hdcslst)
Row 3: hdcslst in each of the next 18 chains, sl st in each od the next 3 sts. Chain 1 and turn. (18 hdcslst, 3 sl sts)
Row 4-30: repeat rows 2-3.
Joining the hat
To join the panel together to form a hat you will lay it down flat. Join the two short ends together. Slip stitch the sides of the hat to join the two short ends of the panel together to form a tube.
Once you reach the top you will use the yarn needle and weave along the top of the hat in and out pulling in every few stitches to tighten up the top of the hat until you reach the beginning.
Then weave in the yarn end back and forth through the top of the hat to secure. Pull tightly and secure the top with several more stitches. Finishing with the yarn tail on the inside of the hat.
Weave in all remaining ends of the hat with the yarn needle! Fold the brim up.
Add a pom pom if you wish.You are done with your new crochet hat!
Crochet Pattern for toddler size (includes 1.5” brim): 16” circumference and 8” height
Chain 23
Row 1: hdslst in the second chain from the hook, hdcslst in each of the next 18 chains, sl st in each next 3 sts. Chain 1 and turn. (19 hdcslst, 3 sl sts)
Starting row 2, every stitch in this pattern wil be owrked in the bacl loop only (blo).
Row 2: sl st blo in each of the first 3 sts, hdcslst blo in the next 19 sts. Chain 1 and turn. (3 sl sts, 19 hdcslst)
Row 3: hdcslst in each of the next 19 chains, sl st in each od the next 3 sts. Chain 1 and turn. (19 hdcslst, 3 sl sts)
Row 4-36: repeat rows 2-3.
Joining the hat
To join the panel together to form a hat you will lay it down flat. Join the two short ends together. Slip stitch the sides of the hat to join the two short ends of the panel together to form a tube.
Once you reach the top you will use the yarn needle and weave along the top of the hat in and out pulling in every few stitches to tighten up the top of the hat until you reach the beginning.
Then weave in the yarn end back and forth through the top of the hat to secure. Pull tightly and secure the top with several more stitches. Finishing with the yarn tail on the inside of the hat.
Weave in all remaining ends of the hat with the yarn needle! You are done with your new crochet hat!
Crochet Pattern for child size (includes 2” brim): 18” circumference and 9.5” height
Chain 27
Row 1: hdslst in the second chain from the hook, hdcslst in each of the next 21 chains, sl st in each next 4 sts. Chain 1 and turn. (22 hdcslst, 4 sl sts)
Starting row 2, every stitch in this pattern wil be owrked in the bacl loop only (blo).
Row 2: sl st blo in each of the first 4 sts, hdcslst blo in the next 22 sts. Chain 1 and turn. (4 sl sts, 22 hdcslst)
Row 3: hdcslst in each of the next 22 chains, sl st in each od the next 4 sts. Chain 1 and turn. (22 hdcslst, 4 sl sts)
Row 4-40: repeat rows 2-3.
Joining the hat
To join the panel together to form a hat you will lay it down flat. Join the two short ends together. Slip stitch the sides of the hat to join the two short ends of the panel together to form a tube.
Once you reach the top you will use the yarn needle and weave along the top of the hat in and out pulling in every few stitches to tighten up the top of the hat until you reach the beginning.
Then weave in the yarn end back and forth through the top of the hat to secure. Pull tightly and secure the top with several more stitches. Finishing with the yarn tail on the inside of the hat.
Weave in all remaining ends of the hat with the yarn needle! You are done with your new crochet hat!
Crochet Pattern for teen size (includes 2.5” brim): 19” circumference and 10” height
Chain 29
Row 1: hdslst in the second chain from the hook, hdcslst in each of the next 22 chains, sl st in each next 5 sts. Chain 1 and turn. (23 hdcslst, 5 sl sts)
Starting row 2, every stitch in this pattern wil be owrked in the bacl loop only (blo).
Row 2: sl st blo in each of the first 5 sts, hdcslst blo in the next 23 sts. Chain 1 and turn. (5 sl sts, 23 hdcslst)
Row 3: hdcslst in each of the next 23 chains, sl st in each od the next 5 sts. Chain 1 and turn. (23 hdcslst, 5 sl sts)
Row 4-42: repeat rows 2-3.
Joining the hat
To join the panel together to form a hat you will lay it down flat. Join the two short ends together. Slip stitch the sides of the hat to join the two short ends of the panel together to form a tube.
Once you reach the top you will use the yarn needle and weave along the top of the hat in and out pulling in every few stitches to tighten up the top of the hat until you reach the beginning.
Then weave in the yarn end back and forth through the top of the hat to secure. Pull tightly and secure the top with several more stitches. Finishing with the yarn tail on the inside of the hat.
Weave in all remaining ends of the hat with the yarn needle! You are done with your new crochet hat!
Crochet Pattern for women size (includes 2.5” brim): 20” circumference and 11” height
Chain 31
Row 1: hdslst in the second chain from the hook, hdcslst in each of the next 24 chains, sl st in each next 5 sts. Chain 1 and turn. (25 hdcslst, 5 sl sts)
Starting row 2, every stitch in this pattern wil be owrked in the bacl loop only (blo).
Row 2: sl st blo in each of the first 5 sts, hdcslst blo in the next 25 sts. Chain 1 and turn. (5 sl sts, 25 hdcslst)
Row 3: hdcslst in each of the next 25 chains, sl st in each od the next 5 sts. Chain 1 and turn. (25 hdcslst, 5 sl sts)
Row 4-44: repeat rows 2-3.
Joining the hat
To join the panel together to form a hat you will lay it down flat. Join the two short ends together. Slip stitch the sides of the hat to join the two short ends of the panel together to form a tube.
Once you reach the top you will use the yarn needle and weave along the top of the hat in and out pulling in every few stitches to tighten up the top of the hat until you reach the beginning.
Then weave in the yarn end back and forth through the top of the hat to secure. Pull tightly and secure the top with several more stitches. Finishing with the yarn tail on the inside of the hat.
Weave in all remaining ends of the hat with the yarn needle! You are done with your new crochet hat!
Crochet Pattern for large adult size (includes 2.5” brim): 22” circumference and 11.5” height
Chain 33
Row 1: hdslst in the second chain from the hook, hdcslst in each of the next 26 chains, sl st in each next 5 sts. Chain 1 and turn. (27 hdcslst, 5 sl sts)
Starting row 2, every stitch in this pattern wil be owrked in the bacl loop only (blo).
Row 2: sl st blo in each of the first 5 sts, hdcslst blo in the next 27 sts. Chain 1 and turn. (5 sl sts, 27 hdcslst)
Row 3: hdcslst in each of the next 27 chains, sl st in each od the next 5 sts. Chain 1 and turn. (27 hdcslst, 5 sl sts)
Row 4-48: repeat rows 2-3.
Joining the hat
To join the panel together to form a hat you will lay it down flat. Join the two short ends together. Slip stitch the sides of the hat to join the two short ends of the panel together to form a tube.
Once you reach the top you will use the yarn needle and weave along the top of the hat in and out pulling in every few stitches to tighten up the top of the hat until you reach the beginning.
Then weave in the yarn end back and forth through the top of the hat to secure. Pull tightly and secure the top with several more stitches. Finishing with the yarn tail on the inside of the hat.
Weave in all remaining ends of the hat with the yarn needle! You are done with your new crochet hat!
IF YOU LIKE EASY TO PRINT THIS PATTERN, THE AD-FREE PDF VERSION OF THIS CROCHET PATTERN WITH A PHOTO TUTORIAL, CAN BE PURCHASED IN THE FOLLOWING PLACES: ETSY AND RAVERLY
I hope you enjoyed my crochet beanie pattern. If you have any comments on today’s tutorial, please feel free to leave me a comment below. I’d love to hear from you! If you’ve tried this pattern, feel free to share your finished projects on my Facebook Page!
Be sure to check out my other patterns on my blog and subscribe for all future projects, patterns and much more. As always, thanks for stopping by!
What’s Next?
Pin this post: Save this tutorial to your >>> Pinterest <<< boards so that you can come back to it later.
Leave a comment: We love to hear your feedback. Tell me in the comments below!
Share on Facebook: When you make this project, share it on social media and tag me.
Have questions? Join the Facebook Group! We created this group for you to share pictures, ask questions, and help each other out.

What does “od” stand for? I didn’t see it mentioned in the listed abbreviatiins.
LikeLike
Hi, Marci! It was a typing error. I fixed it. Thanks for asking!
LikeLike