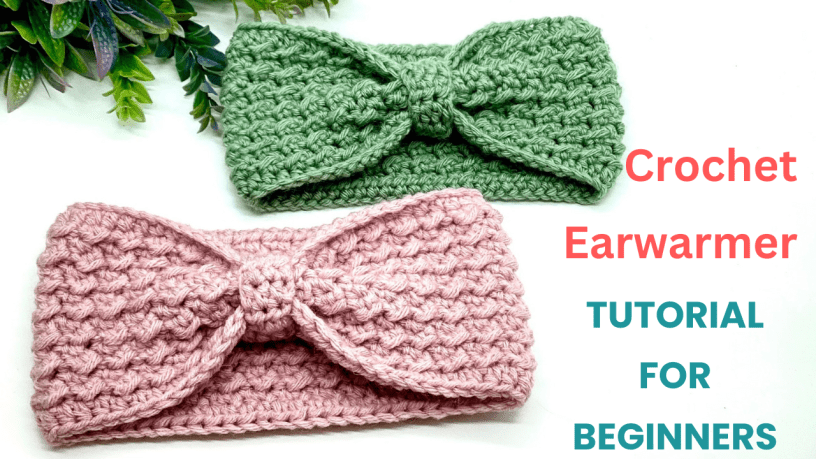
Are you looking for a quick and cozy crochet project that’s perfect for beginners? Look no further! This simple crochet earwarmer pattern is a fantastic way to practice basic crochet stitches while creating something useful and stylish. Whether you’re new to crochet or just looking for a fun project, this earwarmer will be your new favorite accessory for chilly days!
This beginner-friendly crochet earwarmer is made with just three simple stitches: half double crochet (hdc), slip stitch (sl st), and chain stitches (ch). With bulky yarn (size 5) and a 6mm crochet hook, this project works up quickly, and the result is a stylish and cozy accessory perfect for colder weather!
Let’s get started!
Why You’ll Love This Free Crochet Earwarmer Pattern:
- Perfect for Beginners: Simple stitches and easy-to-follow instructions make this project great for beginners.
- Quick and Cozy: Bulky yarn ensures your earwarmer works up quickly while keeping you warm.
- Customizable: You can adjust the size and add your personal touches to make it truly unique.
Crochet Earwarmer Pattern for Beginners: A Simple DIY Project
What You’ll Need:
Stitch Marker (optional)
Yarn: Bulky weight yarn (Size 5) – around 100 yards
Crochet Hook: 6mm (J-10)
Scissors
Yarn Needle (for weaving in the ends)
Basic Stitches You’ll Need to Know:
- Chain (ch): Used to create a foundation or move across rows.
- Half Double Crochet (hdc): This stitch creates a solid yet stretchy fabric, perfect for an earwarmer.
- Slip Stitch (sl st): .
If you’re ready to crochet this adorable earwarmer with me, grab your yarn and hook, and let’s dive right into this step-by-step video tutorial!
Size Breakdown:
- Toddler: 16 -17 inches around, 2.5 inches hight
- Child: 18-19 inches around, 3 inches hight
- Teen: 20 inches around, 4 inches hight
- Women: 22 inches arpound, 4.5 inches hight
- Large Adult: 24 inches around, 4. 5 inches hight
This version of the pattern includes the specific sizes (Toddler, Child, Teen, Women and Large Adult), and each size has the appropriate chain count and measurements for the height. Feel free to adjust the numbers further if needed, but this should serve as a solid base for all the sizes.
Watch the Full Tutorial Below:
Crochet Earwarmer Woman Size Free Pattern:
Gauge:
- Gauge:
- 4 inches (10 cm) = 12 stitches (alternating half double crochet stitches (hdc) and Slip Stitches (sl st)) and 13 rows.
- This is based on using bulky weight (size 5) yarn and a 6mm crochet hook.
How to Check Your Gauge:
- Make a small swatch that measures about 4 inches (10 cm) square using the same yarn and hook size as the pattern.
- Measure across the swatch to count the number of stitches in a 4-inch (10 cm) section.
- Count the number of rows in that same 4-inch (10 cm) section.
- Adjust your tension as needed—if your swatch has more stitches than the gauge, try using a larger hook. If there are fewer stitches, try using a smaller hook.
Foundation Chain
Chain 66 (This is for an adult size earwarmer. You can adjust the number of chains if you need a larger or smaller fit, but make sure to maintain a multiple of 2 chains).
Row 1 – In the 3rd chain from your hook, work a half double crochet (hdc). Continue making hdc stitches in each chain across the row until you reach the end. (64 hdc sts)
Row 2 – Chain 1 and turn your work. In the first stitch, slip stitch (sl st), then in the next stitch, half double crochet (hdc). Slip stitch (sl st) in the next stitch, and then half double crochet (hdc) in the next stitch. Continue this sl st, hdc, sl st, hdc pattern across the entire row, finishing with a half double crochet (hdc) stitch. (32 hdc sts, 32 sl sts)
Repeat Rows 2-14 (or until you reach the desired size)
Chain 1 and turn your work at the beginning of each new row. For each row from Row 2 through Row 14, repeat the same pattern:
Row 15 – Final Row
For Row 15, chain 1 and turn your work. Half double crochet (hdc) in the first stitch and in each stitch across the row, without any slip stitches. This row will give you a solid finish. (62 hdc sts)
Fasten Off and Finish the Earwarmer
- Fasten off the yarn after you’ve completed Row 15.
- Cut a 20-inch (50 cm) length of yarn for seaming the earwarmer together.
Lay flat with right side up. Fold the two short ends together on each side, bring the two folded ends together.
Use the yarn tail and a yarn needle to whip stitch the two short ends of the earwarmer together, forming a circle. This forms the body of the earwarmer. Take your time to make sure the seam is neat and secure.
Pinch the top and the bottom where the seam of the earwarmer is and sew them together.
Weave in the Ends
Once the seam is complete, use the yarn needle to weave in any loose ends for a clean finish.
Create the Strap
- Chain 5.
- In the 3rd chain from your hook, work half double crochet (hdc). Continue working hdc in each remaining chain across the row. You should now have 3 hdc stitches across the chain.
- Chain 1 and turn your work.
- Work one hdc into each stitch across the row. Repeat this step until your strap is long enough to wrap around the center seam of the earwarmer.
Attach the Strap to the Earwarmer
- Once the strap is long enough, fasten off and leave a small tail.
- Wrap the strap around the center seam of the earwarmer where it’s pinched.
- Sew the ends of the strap together using the yarn needle, securing it in place.
Tips for Success:
- Fit: Ensure your earwarmer fits snugly around your head before you sew the ends together. Adjust the number of chains in the foundation chain to make the earwarmer larger or smaller, if needed.
- Yarn Choice: Bulky yarn is perfect for this project because it gives the earwarmer both warmth and structure.
- Gauge: Check your gauge to make sure your earwarmer will fit properly.
Final Thoughts:
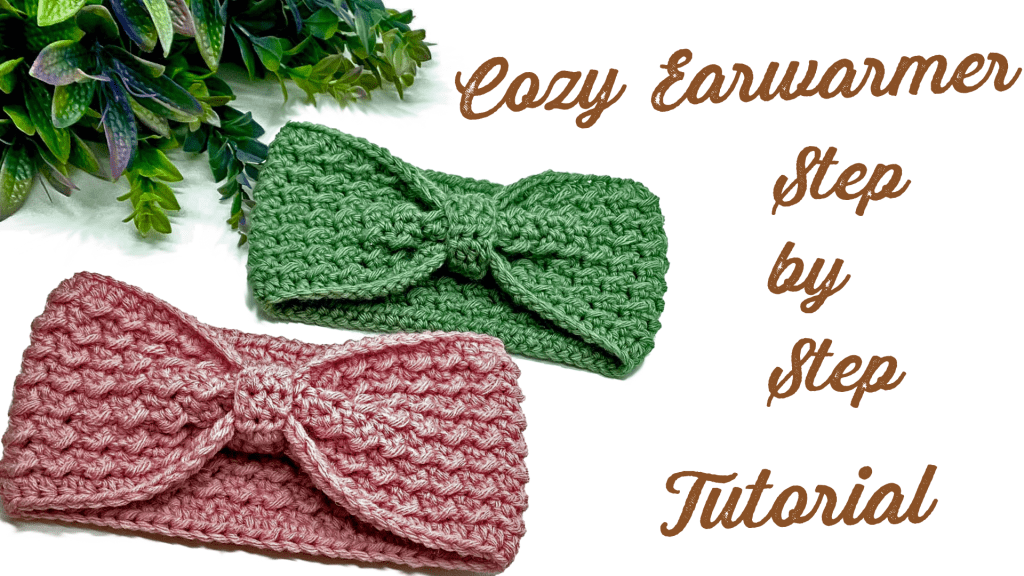
This crochet earwarmer pattern is simple yet stylish, and the added bow look makes it extra cute! With just a few basic stitches, you can create a warm and fashionable accessory that will keep you cozy throughout the colder months. Whether you’re making it for yourself or as a gift, it’s sure to be a hit.
Happy crocheting, and feel free to share how your earwarmer turns out—I’d love to see your beautiful creations!
Watch the Full Tutorial Below:
Crochet Earwarmer Toddler Size Free Pattern: 16-17 inches around, 2.5 inches hight
Foundation Chain
Chain 50 (This is for an adult size earwarmer. You can adjust the number of chains if you need a larger or smaller fit, but make sure to maintain a multiple of 2 chains).
Row 1 – In the 3rd chain from your hook, work a half double crochet (hdc). Continue making hdc stitches in each chain across the row until you reach the end. (48 hdc sts)
Row 2 – Chain 1 and turn your work. In the first stitch, slip stitch (sl st), then in the next stitch, half double crochet (hdc). Slip stitch (sl st) in the next stitch, and then half double crochet (hdc) in the next stitch. Continue this sl st, hdc, sl st, hdc pattern across the entire row, finishing with a half double crochet (hdc) stitch. (24 hdc sts, 24 sl sts)
Repeat Rows 2-8 (or until you reach the desired size)
Chain 1 and turn your work at the beginning of each new row. For each row from Row 2 through Row 8, repeat the same pattern.
Row 9 – Final Row
For Row 9, chain 1 and turn your work. Half double crochet (hdc) in the first stitch and in each stitch across the row, without any slip stitches. This row will give you a solid finish. (48 hdc sts)
Fasten Off and Finish the Earwarmer
- Fasten off the yarn after you’ve completed Row 9.
- Cut a 20-inch (50 cm) length of yarn for seaming the earwarmer together.
Lay flat with right side up. Fold the two short ends together on each side, bring the two folded ends together.
Use the yarn tail and a yarn needle to whip stitch the two short ends of the earwarmer together, forming a circle. This forms the body of the earwarmer. Take your time to make sure the seam is neat and secure.
Pinch the top and the bottom where the seam of the earwarmer is and sew them together.
Weave in the Ends
Once the seam is complete, use the yarn needle to weave in any loose ends for a clean finish.
Create the Strap
- Chain 5.
- In the 3rd chain from your hook, work half double crochet (hdc). Continue working hdc in each remaining chain across the row. You should now have 3 hdc stitches across the chain.
- Chain 1 and turn your work.
- Work one hdc into each stitch across the row. Repeat this step until your strap is long enough to wrap around the center seam of the earwarmer.
Attach the Strap to the Earwarmer
- Once the strap is long enough, fasten off and leave a small tail.
- Wrap the strap around the center seam of the earwarmer where it’s pinched.
- Sew the ends of the strap together using the yarn needle, securing it in place.

Crochet Earwarmer Child Size Free Pattern: 18-19 inches around, 3 inches high
Foundation Chain
Chain 58 (This is for an adult size earwarmer. You can adjust the number of chains if you need a larger or smaller fit, but make sure to maintain a multiple of 2 chains).
Row 1 – In the 3rd chain from your hook, work a half double crochet (hdc). Continue making hdc stitches in each chain across the row until you reach the end. (56 hdc sts)
Row 2 – Chain 1 and turn your work. In the first stitch, slip stitch (sl st), then in the next stitch, half double crochet (hdc). Slip stitch (sl st) in the next stitch, and then half double crochet (hdc) in the next stitch. Continue this sl st, hdc, sl st, hdc pattern across the entire row, finishing with a half double crochet (hdc) stitch. (28 hdc sts, 28 sl sts)
Repeat Rows 2-10 (or until you reach the desired size)
Chain 1 and turn your work at the beginning of each new row. For each row from Row 2 through Row 10, repeat the same pattern. (56 sts)
Row 11 – Final Row
For Row 11, chain 1 and turn your work. Half double crochet (hdc) in the first stitch and in each stitch across the row, without any slip stitches. This row will give you a solid finish. (56 hdc sts)
Fasten Off and Finish the Earwarmer
- Fasten off the yarn after you’ve completed Row 11.
- Cut a 20-inch (50 cm) length of yarn for seaming the earwarmer together.
Lay flat with right side up. Fold the two short ends together on each side, bring the two folded ends together.
Use the yarn tail and a yarn needle to whip stitch the two short ends of the earwarmer together, forming a circle. This forms the body of the earwarmer. Take your time to make sure the seam is neat and secure.
Pinch the top and the bottom where the seam of the earwarmer is and sew them together.
Weave in the Ends
Once the seam is complete, use the yarn needle to weave in any loose ends for a clean finish.
Create the Strap
- Chain 5.
- In the 3rd chain from your hook, work half double crochet (hdc). Continue working hdc in each remaining chain across the row. You should now have 3 hdc stitches across the chain.
- Chain 1 and turn your work.
- Work one hdc into each stitch across the row. Repeat this step until your strap is long enough to wrap around the center seam of the earwarmer.
Attach the Strap to the Earwarmer
- Once the strap is long enough, fasten off and leave a small tail.
- Wrap the strap around the center seam of the earwarmer where it’s pinched.
- Sew the ends of the strap together using the yarn needle, securing it in place.
Crochet Earwarmer Teen Size Free Pattern: 20 inches around, 4 inches hight
Foundation Chain
Chain 62 (This is for an adult size earwarmer. You can adjust the number of chains if you need a larger or smaller fit, but make sure to maintain a multiple of 2 chains).
Row 1 – In the 3rd chain from your hook, work a half double crochet (hdc). Continue making hdc stitches in each chain across the row until you reach the end. (60 hdc sts)
Row 2 – Chain 1 and turn your work. In the first stitch, slip stitch (sl st), then in the next stitch, half double crochet (hdc). Slip stitch (sl st) in the next stitch, and then half double crochet (hdc) in the next stitch. Continue this sl st, hdc, sl st, hdc pattern across the entire row, finishing with a half double crochet (hdc) stitch. (30 hdc sts, 30 sl sts)
Repeat Rows 2-12 (or until you reach the desired size)
Chain 1 and turn your work at the beginning of each new row. For each row from Row 2 through Row 12, repeat the same pattern. (60 sts)
Row 13 – Final Row
For Row 13, chain 1 and turn your work. Half double crochet (hdc) in the first stitch and in each stitch across the row, without any slip stitches. This row will give you a solid finish. (60 hdc sts)
Fasten Off and Finish the Earwarmer
- Fasten off the yarn after you’ve completed Row 13.
- Cut a 20-inch (50 cm) length of yarn for seaming the earwarmer together.
Lay flat with right side up. Fold the two short ends together on each side, bring the two folded ends together.
Use the yarn tail and a yarn needle to whip stitch the two short ends of the earwarmer together, forming a circle. This forms the body of the earwarmer. Take your time to make sure the seam is neat and secure.
Pinch the top and the bottom where the seam of the earwarmer is and sew them together.
Weave in the Ends
Once the seam is complete, use the yarn needle to weave in any loose ends for a clean finish.
Create the Strap
- Chain 5.
- In the 3rd chain from your hook, work half double crochet (hdc). Continue working hdc in each remaining chain across the row. You should now have 3 hdc stitches across the chain.
- Chain 1 and turn your work.
- Work one hdc into each stitch across the row. Repeat this step until your strap is long enough to wrap around the center seam of the earwarmer.
Attach the Strap to the Earwarmer
- Once the strap is long enough, fasten off and leave a small tail.
- Wrap the strap around the center seam of the earwarmer where it’s pinched.
- Sew the ends of the strap together using the yarn needle, securing it in place.

Crochet Earwarmer Large Adult Size Free Pattern: 24 inches around, 4.5 inches hight
Foundation Chain
Chain 78 (This is for an adult size earwarmer. You can adjust the number of chains if you need a larger or smaller fit, but make sure to maintain a multiple of 2 chains).
Row 1 – In the 3rd chain from your hook, work a half double crochet (hdc). Continue making hdc stitches in each chain across the row until you reach the end. (76 hdc sts)
Row 2 – Chain 1 and turn your work. In the first stitch, slip stitch (sl st), then in the next stitch, half double crochet (hdc). Slip stitch (sl st) in the next stitch, and then half double crochet (hdc) in the next stitch. Continue this sl st, hdc, sl st, hdc pattern across the entire row, finishing with a half double crochet (hdc) stitch. (38 hdc sts, 38 sl sts)
Repeat Rows 2-14 (or until you reach the desired size)
Chain 1 and turn your work at the beginning of each new row. For each row from Row 2 through Row 14, repeat the same pattern. (76 sts)
Row 15 – Final Row
For Row 15, chain 1 and turn your work. Half double crochet (hdc) in the first stitch and in each stitch across the row, without any slip stitches. This row will give you a solid finish. (76 hdc sts)
Fasten Off and Finish the Earwarmer
- Fasten off the yarn after you’ve completed 15.
- Cut a 20-inch (50 cm) length of yarn for seaming the earwarmer together.
Lay flat with right side up. Fold the two short ends together on each side, bring the two folded ends together.
Use the yarn tail and a yarn needle to whip stitch the two short ends of the earwarmer together, forming a circle. This forms the body of the earwarmer. Take your time to make sure the seam is neat and secure.
Pinch the top and the bottom where the seam of the earwarmer is and sew them together.
Weave in the Ends
Once the seam is complete, use the yarn needle to weave in any loose ends for a clean finish.
Create the Strap
- Chain 5.
- In the 3rd chain from your hook, work half double crochet (hdc). Continue working hdc in each remaining chain across the row. You should now have 3 hdc stitches across the chain.
- Chain 1 and turn your work.
- Work one hdc into each stitch across the row. Repeat this step until your strap is long enough to wrap around the center seam of the earwarmer.
Attach the Strap to the Earwarmer
- Once the strap is long enough, fasten off and leave a small tail.
- Wrap the strap around the center seam of the earwarmer where it’s pinched.
- Sew the ends of the strap together using the yarn needle, securing it in place.
Tips for Success:
- Fit: Ensure your earwarmer fits snugly around your head before you sew the ends together. Adjust the number of chains in the foundation chain to make the earwarmer larger or smaller, if needed.
- Yarn Choice: Bulky yarn is perfect for this project because it gives the earwarmer both warmth and structure.
- Gauge: Check your gauge to make sure your earwarmer will fit properly.
Final Thoughts:
This crochet earwarmer pattern is simple yet stylish, and the added bow look makes it extra cute! With just a few basic stitches, you can create a warm and fashionable accessory that will keep you cozy throughout the colder months. Whether you’re making it for yourself or as a gift, it’s sure to be a hit.
Happy crocheting, and feel free to share how your earwarmer turns out—I’d love to see your beautiful creations!
SIGN UP FOR MORE PATTERNS TO STAY UPDATED ON PATTERNS:
What’s Next?
Pin this post: Save this tutorial to your >>>Pinterest <<< boards so that you can come back to it later.
Subscribe to my YouTube Channel to stay updated to all my new tutorials: https://www.youtube.com/@SilvanaCrochetStudio
Leave a comment: We love to hear your feedback. Tell me in the comments below!
Share on Facebook: When you make this project, share it on social media and tag me.
Have questions? Join the Facebook Group! We created this group for you to share pictures, ask questions, and help each other out.
You are more than welcome to sell your finished items, but please give Silvana Crochet Studio credit as pattern designer and link back to my shop Ravelry https://www.ravelry.com/designers/silvana-hagiu
If you have any questions about this pattern please feel free to message me.
My patterns (including all photographs) are copyrighted. You may NOT copy, re-distribute or sell my pattern.
