
Few handmade items are as delightful as a baby beanie with tiny bear ears. It’s the perfect blend of warmth, cuteness, and personality. In this post, we’ll explore why this crochet bear baby beanie is a project you’ll love and how you can make one with a straightforward and beginner-friendly pattern.
Get ready to make the most adorable baby beanie with this easy-to-follow Crochet Bear Baby Beanie Pattern! Whether you’re a beginner or a seasoned crocheter, this pattern will guide you step-by-step to create a cozy, cute, and cuddly bear beanie for the little cubs in your life.
The Charm of a Bear Beanie
Adding bear ears to a classic baby beanie transforms it into something truly special. Here’s why this project is a favorite among crafters:
- Perfect for Newborn Photos: Bear ears are irresistible in baby pictures!
- Thoughtful Baby Shower Gift: A handcrafted beanie becomes a treasured keepsake.
- Seasonal Comfort: Cozy and warm for colder months – ideal for fall and winter babies.
✨ Why You’ll Love This Pattern:
✅ Simple and beginner-friendly. This pattern is simple enough for crochet beginners. You’ll use basic stitches, repeat easy rounds, and complete the project in just a few hours.
✅ Soft and comfortable for delicate baby skin
✅ Perfect for baby showers, newborn gifts, or just because!
✅ Customize with different colors to match any outfit
🧶 Materials You’ll Need:
- Worsted weight yarn in your chosen colors
- Crochet hook size (5 mm)
- Yarn needle
- Stitch markers
- Scissors
📏 Sizes Included: Preemie, Newborn, 0-3 months, 3-6 months, 6-12 months
💡 Pro Tip: Add a cute bow or little pom-pom ears to make it even more precious!
Ready to make your own? Scroll to the end for the free pattern now and start crocheting! Happy hooking! 💕
#CrochetBabyBeanie #BearBeanie #HandmadeWithLove #CrochetPattern #BabyGi
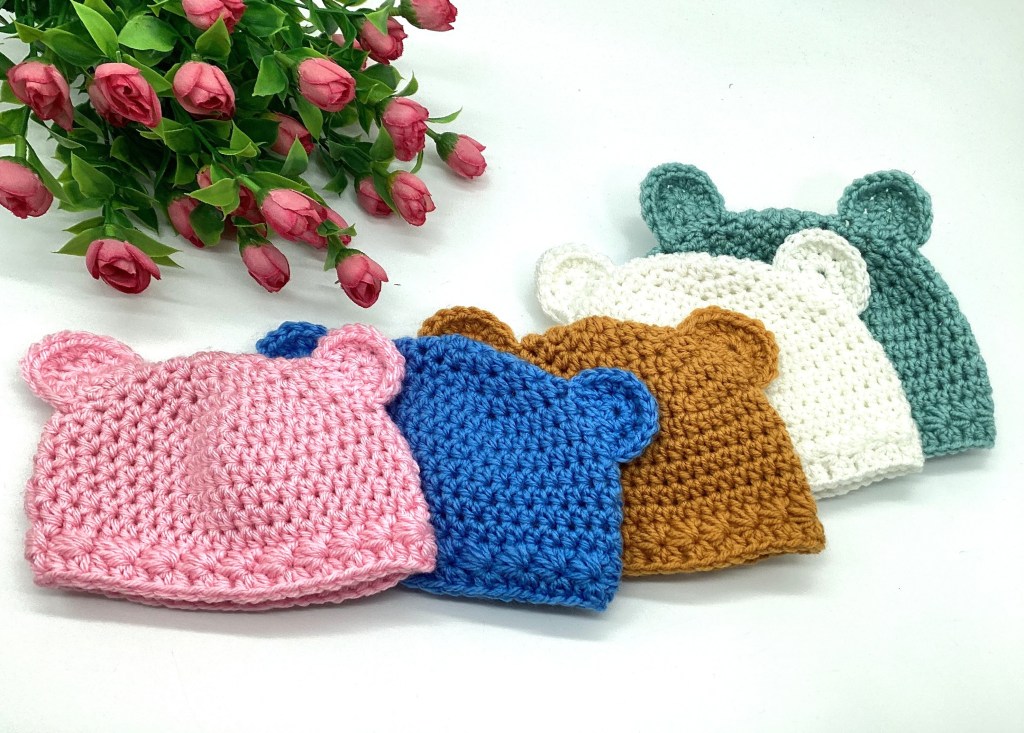
Make It Your Own
Let your creativity shine! Choose traditional colors like tan and brown, or play with pastels and brights. Add bows, flowers, or buttons to suit your style.
Get the Full Pattern PDF Pattern with Step-by-Step Photo Tutorial here: https://www.ravelry.com/patterns/library/baby-bear-beanie-5-sizes It includes clear step-by-step instructions and tips to guide you from start to finish.
Notes about the Crochet Baby Bear Beanie Hat Pattern:
- If a different weight brand of yarn or gauge isn’t followed, then the potholder will not turn out the same size as written.
- Chain(s) from the beginning of each round do not count as a stitch.
- Pattern is written in American English terms.
- Before you start working on the beanie make sure you read through the entire pattern.
Materials you need to make the baby bear beanie hat
- Soft by Red Heart or any #4 worsted weight yarn in soft, baby-friendly colors
- 5 mm crochet hook
- Scissors
- Yarn needle
- 2 stitch markers
- Measuring tape
Terminology – US Terms
ch(s) – chain(s)
st(es) – stitch(es)
sl st – slip stitch
hdc – half double crochet
rep – repeat
sk – skip
sp – space
YO – yarn over
Prefer to crochet along with video instructions? You can watch the full tutorial here:
Gauge: 14 hdc sts x 12 rows = 4 inches (10 cm)
Crochet Stitches Used:
Slip Stitch (sl st): Insert hook into designated stitch, YO (yarn over) and pull back through the st and through the loop on the hook.
Half double Crochet (hdc): Yarn over and insert the crochet hook into the designated stitch. Yarn over again and pull the yarn through the stitch. You should now have three loops on the hook. Yarn over one more time and pull the yarn through all three loops. That completes the half double crochet stitch.
Special Stitches
Magic Ring: wrap the yarn into a ring, ensuring that the tail falls behind the working yarn. Grip ring and tail between the middle finger and thumb. Insert the hook through the center of the ring, yarn over (with working yarn), pull up a loop through the ring and ch 1.
Star Stitch:
The star stitch pattern is quite easy to crochet once you understand where to insert the hook and pool up loops.
Note: You will need 2 rounds to complete full stars: one round of star stitches and one round of half double stitches.
Preemie Baby Size Hat Crochet Pattern
Start with a magic ring.
Round 1: chain 1 and work 8 hdc stitches into the ring. Join the round with a slip stitch to the first stitch. (8 hdc sts)
Round 2: chain 1. Work 2 hdc sts in the first stitch and in each st around. Join the round with a slip stitch to the first stitch. (16 hdc sts)
Round 3: chain 1. Work one hdc in the first st, 2 hdc in the next sts, [one hdc st in the next st, 2 hdc sts in the next]. Repeat from [ to ] around. Join the round with a slip stitch to the first stitch. (24 hdc sts)
Round 4: chain 1. Work one hdc st in the first 2 sts, 2 hdc sts in the next st, [one hdc st in the next 2 sts, 2 hdc sts in the next st]. Repeat from [ to ] around. Join the round with a slip stitch to the first stitch. (32 hdc sts)
Round 5: chain 1. Work one hdc st in the first 3 sts, 2 hdc sts in the next st, [one hdc st in the next 2 sts, 2 hdc sts in the next st]. Repeat from [ to ] around. Join the round with a slip stitch to the first stitch. (40 hdc sts)
Round 6-11: chain 1. Work 1 hdc st in the first stitch and in each stitch around. Join the round with a slip stitch to the first stitch. (40 hdc sts)
Round 12: ch 3, work star stitches all the way around. Join the round with a slip stitch to the 3rd chain. (20 star stitches)
Round 13: ch 1, work 2 hdc in same ch1-sp (the “eye of the star), 2hdc into ch1-sp (the “eye of the star), of each star around; join the round with an invisible join. (40 hdc sts)
Add the Bear Ears to the Beanie Hat (make 2)
Round 1: Work 8 hdc stitches into a magic ring. Join the round with a slip stitch to the firs stitch (8 hdc sts)
Round 2: chain 1, work 2 hdc in the first six stitches. (12 hdc sts)
Fasten off and trim the yarn, leaving a 10-inch (25 cm) tail for sewing.
Use two stitch markers to position the ear on the beanie. Thread the yarn tail onto a yarn needle, then securely attach the ear using a whip stitch.
Repeat the same process for the second ear: position it with stitch markers, thread the yarn tail through a needle, and sew it onto the beanie using a whip stitch.
Finishing Touches: Weave in the ends on the inside of the beanie.
Congratulations – your adorable bear baby beanie is complete!

Subscribe to my YouTube Channel to stay updated to all my new tutorials: https://www.youtube.com/@SilvanaCrochetStudio
Newborn Baby Size Hat Crochet Pattern
Start with a magic ring.
Round 1: chain 1 and work 8 hdc stitches into the ring. Join the round with a slip stitch to the first stitch. (8 hdc sts)
Round 2: chain 1. Work 2 hdc sts in the first stitch and in each st around. Join the round with a slip stitch to the first stitch. (16 hdc sts)
Round 3: chain 1. Work one hdc in the first st, 2 hdc in the next sts, [one hdc st in the next st, 2 hdc sts in the next]. Repeat from [ to ] around. Join the round with a slip stitch to the first stitch. (24 hdc sts)
Round 4: chain 1. Work one hdc st in the first 2 sts, 2 hdc sts in the next st, [one hdc st in the next 2 sts, 2 hdc sts in the next st]. Repeat from [ to ] around. Join the round with a slip stitch to the first stitch. (32 hdc sts)
Round 5: chain 1. Work one hdc st in the first 3 sts, 2 hdc sts in the next st, [one hdc st in the next 3 sts, 2 hdc sts in the next st]. Repeat from [ to ] around. Join the round with a slip stitch to the first stitch. (40 hdc sts)
Round 6: chain 1. Work one hdc st in the first 9 sts, 2 hdc sts in the 10th st, [one hdc st in the next 9 sts, 2 hdc sts in the 10th st]. Repeat from [ to ] around. Join the round with a slip stitch to the first stitch. (44 hdc sts)
Round 7-11: chain 1. Work 1 hdc st in the first stitch and in each stitch around. Join the round with a slip stitch to the first stitch. (44 hdc sts)
Round 12: ch 3, work star stitches all the way around. Join the round with a slip stitch to the 3rd chain. (22 star stitches)
Round 13: ch 1, work 2 hdc in same ch1-sp (the “eye of the star), 2hdc into ch1-sp (the “eye of the star), of each star around; join the round with an invisible join. (44 hdc sts)
Add the Bear Ears:
The ears (make 2)
Round 1: Work 8 hdc stitches into a magic ring. Join the round with a slip stitch to the firs stitch (8 hdc sts)
Round 2: chain 1, work 2 hdc in the first six stitches. (12 hdc sts)
Fasten off and trim the yarn, leaving a 10-inch (25 cm) tail for sewing.
Use two stitch markers to position the ear on the beanie. Thread the yarn tail onto a yarn needle, then securely attach the ear using a whip stitch.
Repeat the same process for the second ear: position it with stitch markers, thread the yarn tail through a needle, and sew it onto the beanie using a whip stitch.
Finishing Touches: Weave in the ends on the inside of the beanie.
Congratulations – your adorable bear baby beanie is complete!
0-3 Months Baby Size Hat Crochet Pattern
Start with a magic ring.
Round 1: chain 1 and work 8 hdc stitches into the ring. Join the round with a slip stitch to the first stitch. (8 hdc sts)
Round 2: chain 1. Work 2 hdc sts in the first stitch and in each st around. Join the round with a slip stitch to the first stitch. (16 hdc sts)
Round 3: chain 1. Work one hdc in the first st, 2 hdc in the next sts, [one hdc st in the next st, 2 hdc sts in the next]. Repeat from [ to ] around. Join the round with a slip stitch to the first stitch. (24 hdc sts)
Round 4: chain 1. Work one hdc st in the first 2 sts, 2 hdc sts in the next st, [one hdc st in the next 2 sts, 2 hdc sts in the next st]. Repeat from [ to ] around. Join the round with a slip stitch to the first stitch. (32 hdc sts)
Round 5: chain 1. Work one hdc st in the first 3 sts, 2 hdc sts in the next st, [one hdc st in the next 2 sts, 2 hdc sts in the next st]. Repeat from [ to ] around. Join the round with a slip stitch to the first stitch. (40 hdc sts)
Round 6: chain 1. Work one hdc st in the first 4 sts, 2 hdc sts in the next st, [one hdc st in the next 4 sts, 2 hdc sts in the next st]. Repeat from [ to ] around. Join the round with a slip stitch to the first stitch. (48 hdc sts)
Round 7-12: chain 1. Work 1 hdc st in the first stitch and in each stitch around. Join the round with a slip stitch to the first stitch. (48 hdc sts)
Round 13: ch 3, work star stitches all the way around. Join the round with a slip stitch to the 3rd chain. (24 star stitches)
Round 14: ch 1, work 2 hdc in same ch1-sp (the “eye of the star), 2hdc into ch1-sp (the “eye of the star), of each star around; join the round with an invisible join. (48 hdc sts)
Add the Bear Ears:
The ears (make 2)
Round 1: Work 8 hdc stitches into a magic ring. Join the round with a slip stitch to the firs stitch (8 hdc sts)
Round 2: chain 1, work 2 hdc in the first six stitches. (12 hdc sts)
Fasten off and trim the yarn, leaving a 10-inch (25 cm) tail for sewing.
Use two stitch markers to position the ear on the beanie. Thread the yarn tail onto a yarn needle, then securely attach the ear using a whip stitch.
Repeat the same process for the second ear: position it with stitch markers, thread the yarn tail through a needle, and sew it onto the beanie using a whip stitch.
Finishing Touches: Weave in the ends on the inside of the beanie.
Congratulations – your adorable bear baby beanie is complete!
Watch the Video Tutorial
If you’d like to follow along with a video tutorial, head over to my YouTube channel where I walk you through each step of making this cute baby bear beanie hat! It’s a great way to learn while crocheting. Be sure to subscribe for more free crochet patterns and tutorials!
3-6 Months Baby Size Hat Crochet Pattern
Start with a magic ring.
Round 1: chain 1 and work 8 hdc stitches into the ring. Join the round with a slip stitch to the first stitch. (8 hdc sts)
Round 2: chain 1. Work 2 hdc sts in the first stitch and in each st around. Join the round with a slip stitch to the first stitch. (16 hdc sts)
Round 3: chain 1. Work one hdc in the first st, 2 hdc in the next sts, [one hdc st in the next st, 2 hdc sts in the next]. Repeat from [ to ] around. Join the round with a slip stitch to the first stitch. (24 hdc sts)
Round 4: chain 1. Work one hdc st in the first 2 sts, 2 hdc sts in the next st, [one hdc st in the next 2 sts, 2 hdc sts in the next st]. Repeat from [ to ] around. Join the round with a slip stitch to the first stitch. (32 hdc sts)
Round 5: chain 1. Work one hdc st in the first 3 sts, 2 hdc sts in the next st, [one hdc st in the next 2 sts, 2 hdc sts in the next st]. Repeat from [ to ] around. Join the round with a slip stitch to the first stitch. (40 hdc sts)
Round 6: chain 1. Work one hdc st in the first 4 sts, 2 hdc sts in the next st, [one hdc st in the next 4 sts, 2 hdc sts in the next st]. Repeat from [ to ] around. Join the round with a slip stitch to the first stitch. (48 hdc sts)
Round 7: chain 1. Work one hdc st in the first 9 sts, 2 hdc sts in the 10th st, [one hdc st in the next 9 sts, 2 hdc sts in the 10th st]. Repeat from [ to ] around. Join the round with a slip stitch to the first stitch. (52 hdc sts)
Round 8-13: chain 1. Work 1 hdc st in the first stitch and in each stitch around. Join the round with a slip stitch to the first stitch. (52 hdc sts)
Round 14: ch 3, work star stitches all the way around. Join the round with a slip stitch to the 3rd chain. (26 star stitches)
Round 15: ch 1, work 2 hdc in same ch1-sp (the “eye of the star), 2hdc into ch1-sp (the “eye of the star), of each star around; join the round with an invisible join. (40 hdc sts)
Add the Bear Ears:
The ears (make 2)
Round 1: Work 8 hdc stitches into a magic ring. Join the round with a slip stitch to the firs stitch (8 hdc sts)
Round 2: chain 1, work 2 hdc in the first six stitches. (12 hdc sts)
Fasten off and trim the yarn, leaving a 10-inch (25 cm) tail for sewing.
Use two stitch markers to position the ear on the beanie. Thread the yarn tail onto a yarn needle, then securely attach the ear using a whip stitch.
Repeat the same process for the second ear: position it with stitch markers, thread the yarn tail through a needle, and sew it onto the beanie using a whip stitch.
Finishing Touches: Weave in the ends on the inside of the beanie.
Congratulations – your adorable bear baby beanie is complete!
6-12 Months Baby Size Hat Crochet Pattern
Start with a magic ring.
Round 1: chain 1 and work 8 hdc stitches into the ring. Join the round with a slip stitch to the first stitch. (8 hdc sts)
Round 2: chain 1. Work 2 hdc sts in the first stitch and in each st around. Join the round with a slip stitch to the first stitch. (16 hdc sts)
Round 3: chain 1. Work one hdc in the first st, 2 hdc in the next sts, [one hdc st in the next st, 2 hdc sts in the next]. Repeat from [ to ] around. Join the round with a slip stitch to the first stitch. (24 hdc sts)
Round 4: chain 1. Work one hdc st in the first 2 sts, 2 hdc sts in the next st, [one hdc st in the next 2 sts, 2 hdc sts in the next st]. Repeat from [ to ] around. Join the round with a slip stitch to the first stitch. (32 hdc sts)
Round 5: chain 1. Work one hdc st in the first 3 sts, 2 hdc sts in the next st, [one hdc st in the next 2 sts, 2 hdc sts in the next st]. Repeat from [ to ] around. Join the round with a slip stitch to the first stitch. (40 hdc sts)
Round 6: chain 1. Work one hdc st in the first 4 sts, 2 hdc sts in the next st, [one hdc st in the next 4 sts, 2 hdc sts in the next st]. Repeat from [ to ] around. Join the round with a slip stitch to the first stitch. (48 hdc sts)
Round 7: chain 1. Work one hdc st in the first 5 sts, 2 hdc sts in the next st, [one hdc st in the next 5 sts, 2 hdc sts in the next st]. Repeat from [ to ] around. Join the round with a slip stitch to the first stitch. (56 hdc sts)
Round 8-13: chain 1. Work 1 hdc st in the first stitch and in each stitch around. Join the round with a slip stitch to the first stitch. (56 hdc sts)
Round 14: ch 3, work star stitches all the way around. Join the round with a slip stitch to the 3rd chain. (28 star stitches)
Round 15: ch 1, work 2 hdc in same ch1-sp (the “eye of the star), 2hdc into ch1-sp (the “eye of the star), of each star around; join the round with an invisible join. (56 hdc sts)
Add the Bear Ears:
The ears (make 2)
Round 1: Work 8 hdc stitches into a magic ring. Join the round with a slip stitch to the firs stitch (8 hdc sts)
Round 2: chain 1, work 2 hdc in the first six stitches. (12 hdc sts)
Fasten off and trim the yarn, leaving a 10-inch (25 cm) tail for sewing.
Use two stitch markers to position the ear on the beanie. Thread the yarn tail onto a yarn needle, then securely attach the ear using a whip stitch.
Repeat the same process for the second ear: position it with stitch markers, thread the yarn tail through a needle, and sew it onto the beanie using a whip stitch.
Finishing Touches: Weave in the ends on the inside of the beanie.
Congratulations – your adorable bear baby beanie is complete!
Make It Your Own
Let your creativity shine! Choose traditional colors like tan and brown, or play with pastels and brights. Add bows, flowers, or buttons to suit your style.
Get the Full Pattern
Ready to get started? Download the full, detailed pattern here: https://www.ravelry.com/patterns/library/baby-bear-beanie-5-sizes . It includes clear instructions and tips to guide you from start to finish.
Wrap-Up
Crafting a bear baby beanie is a joyful and satisfying experience. Whether you’re creating a gift, making memories, or adding to your craft sale inventory, this pattern brings warmth and charm to any project. Happy stitching!
#CrochetBabyHat #BearBeaniePattern #DIYBabyGift #CrochetBeginner #HandmadeBaby #CraftingJoy
Join Our Crochet Community!
Loved this crochet beanie hat pattern? Want more easy and stylish crochet projects delivered straight to your inbox? Subscribe to our email list today! Get exclusive patterns, tips, and tutorials to help you grow your crochet skills and stay inspired. Whether you’re a beginner or an experienced crocheter, there’s always something new to discover.
Simply enter your email below, and you’ll never miss a stitch!
Happy crocheting, and we can’t wait to see you in our community! 😊
What’s Next?
Pin this post: Save this tutorial to your >>>Pinterest <<< boards so that you can come back to it later.
Subscribe to my YouTube Channel to stay updated to all my new tutorials: https://www.youtube.com/@SilvanaCrochetStudio
Leave a comment: We love to hear your feedback. Tell me in the comments below!
Share on Facebook: When you make this project, share it on social media and tag me.
Subscribe to my YouTube channel for more free crochet video tutorials!
Have questions? Join the Facebook Group! We created this group for you to share pictures, ask questions, and help each other out.
You are more than welcome to sell your finished items, but please give Silvana Crochet Studio credit as pattern designer and link back to my shop Ravelry https://www.ravelry.com/designers/silvana-hagiu
If you have any questions about this pattern please feel free to message me.
My patterns (including all photographs) are copyrighted. You may NOT copy, re-distribute or sell my pattern.
#Crochet headband pattern #Beginner crochet pattern #Easy crochet headband #Crochet accessories #Headband crochet tutorial #Crochet headband for beginners #Simple crochet pattern #Half double crochet headband #Crochet headband free pattern #DIY crochet headband #Headband crochet project
#Quick crochet pattern
#Crochet for beginners
#CrochetBabyHat #BearBeaniePattern #DIYBabyGift #CrochetBeginner #HandmadeBaby #CraftingJoy
