

Looking for a sweet and stylish crochet project? This free Crochet Heart Lace Beanie Pattern is perfect for beginners and makes a beautiful gift for Valentine’s Day, birthdays, baby showers, or just because! Using size 4 worsted weight acrylic yarn and a 5mm crochet hook, this pattern creates a delicate lace beanie with a pretty heart stitch design.
This heart lace crochet hat pattern is available in multiple sizes – from baby to large adult – making it a versatile project for the whole family. Follow the step-by-step instructions or watch the full video tutorial to crochet this lightweight, romantic beanie.
🧶 Crochet Heart Lace Beanie Pattern Details
- Skill Level: Beginner-friendly
- Yarn: Size 4 (Worsted weight) acrylic yarn
- Hook: 5mm crochet hook (H-8)
- Sizes: Baby, Toddler, Child, Teen, Small Adult, Large Adult
- Pattern Type: Lightweight lace beanie with heart stitch design
- Season: Perfect for spring, summer, and fall wear
✨ Why You’ll Love This Pattern
- Simple, step-by-step instructions for beginners
- Beautiful heart lace design that’s unique and eye-catching
- Quick project – can be completed in just a few hours
- Customizable sizing for newborns to adults
- Perfect handmade gift idea for loved ones
📹 Video Tutorial
Prefer to watch and crochet along? Check out the full YouTube tutorial here: https://youtu.be/Nt0OqSGPjVM
This video breaks down every step, making it easy even for first-time crocheters.
💡 Tips for Crocheting the Heart Lace Beanie
- Use contrasting colors for a two-tone heart effect.
- Use soft acrylic yarn for a comfortable, lightweight finish.
- Adjust hook size slightly if you crochet tightly or loosely.
- Add a cute pom-pom on top for an extra touch of charm.
📌 Crochet Pattern Notes
- Pattern is written in American English terms.
- This beanie’s construction consists of one stretchy headband piece, worked in rows back and forth, seamed together and the body of the hat worked into the sides of the rows of the stretchy hat band. This makes modifying the hat easy to accommodate a variety of head sizes.
- Chains at the beginning of the rounds do not count as stitch.
- Keep your tension very relaxed, if you need you can use one size bigger crochet hook.
- Weave in ends as needed.
✅ Don’t Miss This!
📌 Subscribe to my YouTube channel for more free crochet patterns and tutorials every week https://youtu.be/Nt0OqSGPjVM !
📌 Pin this pattern on Pinterest so you can find it later!
Get the Full Premium PDF Pattern
Ready to get started? Download the full, detailed pattern here: https://www.ravelry.com/patterns/library/heart-lace-beanie-2. It includes clear step by step instructions and tips to guide you from start to finish.
Materials
- Burcum Klasik by Alize, 100 g /210 meters (3.53 ounces/230 yards) in two colors or any worsted #4 size yarn you have making sure to fit the gauge.
- 5mm size crochet hook
- Scissors
- Measuring tape
- Tapestry needle
- Pom pom (optional)
Terminology (US Terms):
- ch = chain
- st = stitch
- sl st = slip stitch
- sc = single crochet
- scblo = single crochet back loop only
- dc = double crochet
- yo = yarn over
- sk = skip
Gauge: 16 sc blo sts /13 rows = 4” /10 cm (in the brim)
Crochet Stitches Used
Slip Stitch (sl st): Insert hook into designated stitch, YO (yarn over) and pull back through the st and through the loop on the hook.
Single crochet (sc): insert your hook into designated stitch, YO and pull up a loop, YO and pull through two loops on the hook.
Double crochet (dc): YO, insert your hook into designated stitch, YO and pull up a loop, YO and pull through two loops, YO and pull through remaining two loops on the hook.
Special stitches:
Single crochet back loop only (scblo): when you crochet a row of single crochet stitches and look at the top, you’ll see how those little Vs form the stitches you crochet into. When you hold the piece of crochet in front of you with the Vs on top, the part of the V closest to you is the front loop. The part of the V farther away from you on the opposite side is the back loop. To crochet in the back loop of a stitch, insert your crochet hook underneath the back loop only and make the stitch as indicated in the pattern.
Double Crochet Decrease (dc2tog): Yarn over hook., insert hook into next stitch, yarn over, pull the yarn through the stitch. There should be three loops on your hook, yarn over.Pull the yarn through the first two stitches. There should now be two loops on your hook. Leave those two loops on the hook, yarn over and insert your hook into the next stitch, yarn over and pull through the first two stitches. There should be three loops on the hook, yarn over and pull through all three stitches.
📝 Crochet Heart Lace Beanie Pattern (Written Instructions)
Baby Size Slouch (16” circumference/6-6.5” height)
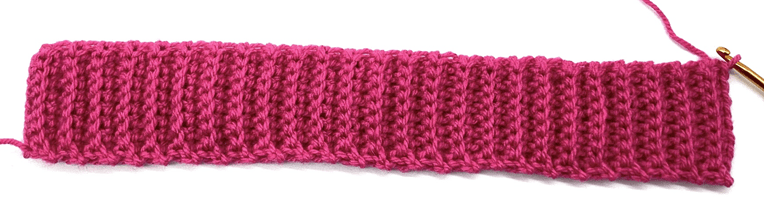
The elastic band (using color A): chain 6.
Note: this pattern is for simple brim. If you desire to make a folded double brim, then chain a double number of chains and follow the pattern.
Row 1: Sc in 2nd ch from hook. Sc in each chain stitch to the end of the chain (5 sc sts)
Starting row 2, we’ll be working all the stitches in the back loop only. To avoid loops at the edge, the last stitch of each row will be worked using both top.
Row 2: Ch 1 and turn, scblo in the first stitch and in each st across, working the last st using both top loops. (4 scblo, 1 sc)
Row 3 – 50: repeat row 2.
The band should wrap comfortably ar ound your head at this point. If it seems too big, or you want a tighter hat you are welcome to leave off some of the final rows. If you want a little larger, add some more rows to the desired length. Always remember the rows count should be a multiple of 5 to to maintain the same stitch count as the pattern calls for.
Do not cut yarn! Continue with the Seam!
THE SEAM: Fold the piece into half, hold row 1 edge above the last row edge. Chain 1 and slip stitch the short sides together inserting the hook through the back loops of the first side and through the unworked loops of the foundation chain .
Chain 1 and flip the band inside out.
The Body of the Hat
Work in the round around the edge.
Round 1: Chain 1, work around the edge 50 sc st (working one st into each “rib” st and one st into each “valley” st on the edge); join round with sl st to top of first sc st. (50 sc sts)
Round 2 (using color A): Chain 3 (counts as a dc stitch), work 1 dc sts in the first stitch (where you worked the sl st), chain 1, work 2 dc sts in the same stitch and chain 4. [Skip 4 stitches, work 2 dc sts in the 5th st, ch 1, 2 dc sts in the same stitch and chain 4]. Repeat from [ to ] around. Join the round with a slip stitch to the 3rd chain from the beginning if the round, then continue to slip stitch to the the first dc st, then to thechain 1 space with color B. (10 shells, 10 chain-4 spaces)
Round 3 (using color B): Ch 1. Work 1 sc in the next ch-1 space. Ch 2, skip the next 2 dc sts, dc in the second and third stitches from 2 rounds below, working around the chain space from the previous round. Ch 2, skip the next 2 dc from the previous round. [Sc in the next ch-1 space, ch 2, skip next 2 dc sts, dc in the second and third stitches 2 rounds below (working around the chain space), ch 2, skip the next 2 dc sts.] Repeat from [ to ] around.
Join with a sl st to the first sc of the round. Sl st into the next ch-2 space, sl st into the first dc, then sl st to the space between the dc posts using Color A. (10 sc sts, 20 dc sts, 20 chain-2 spaces)
Round 4 (using color A): Chain 3 (counts as a dc stitch), work 1 dc sts in the same space (where you worked the sl st), chain 1, work 2 dc sts in the same space and chain 4. [Skip all the stitches to the next space between the two double crochet posts, work 2 dc sts , ch 1, 2 dc sts all in the same space and chain 4]. Repeat from [ to ] around. Join the round with a slip stitch to the 3rd chain from the beginning if the round, then continue to slip stitch to the the first dc st, then to the chain 1 space with color B. (10 shells, 10 chain-4 spaces)
Round 5 (using color B): Ch 1. Work 1 sc in the next ch-1 space. Ch 2, skip the next 2 dc sts. Dc into the first ch-2 space from 2 rounds below, skip the next st, then dc into the next ch-2 space from 2 rounds below, working around the chain space from the previous round. Ch 2, skip the next 2 dc from the previous round. [Dc into the first ch-2 space from 2 rounds below, skip the next st, dc into the next ch-2 space from 2 rounds below (working around the chain space), ch 2, skip the next 2 dc sts.] Repeat from [ to ] around. Join with a sl st to the first sc of the round. Sl st into the next ch-2 space, sl st into the first dc, then sl st to the space between the dc posts using Color A. (10 sc sts, 20 dc sts, 20chain-2 spaces)
Repeat Rounds 4 and 5 until your hat measures 5.5″ (14 cm) tall, or until it is 1″ (2.5 cm) shorter than the desired finished height.
Then, begin the decrease rounds.
Decreasing
Join the last round with a slip stitch to the first sc stitch using Color A.
Fasten off Color B and cut the yarn.
Round 1 (using color A): Ch 3 (does not count as a stitch). Work 1 dc in the first ch-2 space. [Dc in the space between the dc posts from the previous round, 1 dc in each of the next two ch-2 spaces.] Repeat from [ to ] around. Join with a sl st to the first dc of the round. (25 sts)
Round 2: Work a dc decrease (dc2tog) over the first two stitches, and repeat a dc2tog in each stitch around. Join with a sl st to the first dc of the round. (13 sts)
Round 3: Work a dc decrease (dc2tog) over the first two stitches, and repeat a dc2tog in each stitch around. Join with a sl st to the first dc of the round. (7 sts)
Finishing
Fasten off and cut the yarn, leaving a 10” (25 cm) tail.
Thread the tail onto a tapestry needle, and whip stitch around the top opening of the hat. Pull gently but firmly to tighten the circle as much as possible, then use the needle to close any remaining gap at the top.
Weave in all remaining yarn ends using the tapestry needle.
(Optional) Attach a faux fur pompom to the top of the hat for a decorative touch.

Toddler/Preschool Size Slouch (17” circumference/6.5-7” height)
The elastic band (using color A): chain 8.
Note: this pattern is for simple brim. If you desire to make a folded double brim, then chain a double number of chains and follow the pattern.
Row 1: Sc in 2nd ch from hook. Sc in each chain stitch to the end of the chain (7 sc sts)
Starting row 2, we’ll be working all the stitches in the back loop only. To avoid loops at the edge, the last stitch of each row will be worked using both top.
Row 2: Ch 1 and turn, scblo in the first stitch and in each st across, working the last st using both top loops. (6 scblo, 1 sc)
Row 3 – 55: repeat row 2.
The band should wrap comfortably ar ound your head at this point. If it seems too big, or you want a tighter hat you are welcome to leave off some of the final rows. If you want a little larger, add some more rows to the desired length. Always remember the rows count should be a multiple of 5 to to maintain the same stitch count as the pattern calls for.
Do not cut yarn! Continue with the Seam!
THE SEAM: Fold the piece into half, hold row 1 edge above the last row edge. Chain 1 and slip stitch the short sides together inserting the hook through the back loops of the first side and through the unworked loops of the foundation chain .
Chain 1 and flip the band inside out.
The Body of the Hat
Work in the round around the edge.
Round 1: Chain 1, work around the edge 55 sc st (working one st into each “rib” st and one st into each “valley” st on the edge); join round with sl st to top of first sc st. (55 sc sts)
Round 2 (using color A): Chain 3 (counts as a dc stitch), work 1 dc sts in the first stitch (where you worked the sl st), chain 1, work 2 dc sts in the same stitch and chain 4. [Skip 4 stitches, work 2 dc sts in the 5th st, ch 1, 2 dc sts in the same stitch and chain 4]. Repeat from [ to ] around. Join the round with a slip stitch to the 3rd chain from the beginning if the round, then continue to slip stitch to the the first dc st, then to thechain 1 space with color B. (11 shells, 11 chain-4 spaces)
Round 3 (using color B): Ch 1. Work 1 sc in the next ch-1 space. Ch 2, skip the next 2 dc sts, dc in the second and third stitches from 2 rounds below, working around the chain space from the previous round. Ch 2, skip the next 2 dc from the previous round. [Sc in the next ch-1 space, ch 2, skip next 2 dc sts, dc in the second and third stitches 2 rounds below (working around the chain space), ch 2, skip the next 2 dc sts.] Repeat from [ to ] around.
Join with a sl st to the first sc of the round. Sl st into the next ch-2 space, sl st into the first dc, then sl st to the space between the dc posts using Color A. (11 sc sts, 22 dc sts, 22 chain-2 spaces)
Round 4 (using color A): Chain 3 (counts as a dc stitch), work 1 dc sts in the same space (where you worked the sl st), chain 1, work 2 dc sts in the same space and chain 4. [Skip all the stitches to the next space between the two double crochet posts, work 2 dc sts , ch 1, 2 dc sts all in the same space and chain 4]. Repeat from [ to ] around. Join the round with a slip stitch to the 3rd chain from the beginning if the round, then continue to slip stitch to the the first dc st, then to the chain 1 space with color B. (11 shells, 11 chain-4 spaces)
Round 5 (using color B): Ch 1. Work 1 sc in the next ch-1 space. Ch 2, skip the next 2 dc sts. Dc into the first ch-2 space from 2 rounds below, skip the next st, then dc into the next ch-2 space from 2 rounds below, working around the chain space from the previous round. Ch 2, skip the next 2 dc from the previous round. [Dc into the first ch-2 space from 2 rounds below, skip the next st, dc into the next ch-2 space from 2 rounds below (working around the chain space), ch 2, skip the next 2 dc sts.] Repeat from [ to ] around. Join with a sl st to the first sc of the round. Sl st into the next ch-2 space, sl st into the first dc, then sl st to the space between the dc posts using Color A. (11 sc sts, 22 dc sts, 22chain-2 spaces)
Repeat Rounds 4 and 5 until your hat measures 5.5″ (14 cm) tall, or until it is 1″ (2.5 cm) shorter than the desired finished height.
Then, begin the decrease rounds.
Decreasing
Join the last round with a slip stitch to the first sc stitch using Color A.
Fasten off Color B and cut the yarn.
Round 1 (using color A): Ch 3 (does not count as a stitch). Work 1 dc in the first ch-2 space. [Dc in the space between the dc posts from the previous round, 1 dc in each of the next two ch-2 spaces.] Repeat from [ to ] around. Join with a sl st to the first dc of the round. (28 sts)
Round 2: Work a dc decrease (dc2tog) over the first two stitches, and repeat a dc2tog in each stitch around. Join with a sl st to the first dc of the round. (14 sts)
Round 3: Work a dc decrease (dc2tog) over the first two stitches, and repeat a dc2tog in each stitch around. Join with a sl st to the first dc of the round. (7 sts)
Finishing
Fasten off and cut the yarn, leaving a 10” (25 cm) tail.
Thread the tail onto a tapestry needle, and whip stitch around the top opening of the hat. Pull gently but firmly to tighten the circle as much as possible, then use the needle to close any remaining gap at the top.
Weave in all remaining yarn ends using the tapestry needle.
(Optional) Attach a faux fur pompom to the top of the hat for a decorative touch.
Child Beanie Size Pattern (19 inches/47.5 cm circumference)
The elastic band (using color A): chain 10.
Note: this pattern is for simple brim. If you desire to make a folded double brim, then chain a double number of chains and follow the pattern.
Row 1: Sc in 2nd ch from hook. Sc in each chain stitch to the end of the chain (9 sc sts)
Starting row 2, we’ll be working all the stitches in the back loop only. To avoid loops at the edge, the last stitch of each row will be worked using both top.
Row 2: Ch 1 and turn, scblo in the first stitch and in each st across, working the last st using both top loops. (8 scblo, 1 sc)
Row 3 – 60: repeat row 2.
The band should wrap comfortably ar ound your head at this point. If it seems too big, or you want a tighter hat you are welcome to leave off some of the final rows. If you want a little larger, add some more rows to the desired length. Always remember the rows count should be a multiple of 5 to to maintain the same stitch count as the pattern calls for.
Do not cut yarn! Continue with the Seam!
THE SEAM: Fold the piece into half, hold row 1 edge above the last row edge. Chain 1 and slip stitch the short sides together inserting the hook through the back loops of the first side and through the unworked loops of the foundation chain .
Chain 1 and flip the band inside out.
The Body of the Hat
Work in the round around the edge.
Round 1: Chain 1, work around the edge 60 sc st (working one st into each “rib” st and one st into each “valley” st on the edge); join round with sl st to top of first sc st. (60 sc sts)
Round 2 (using color A): Chain 3 (counts as a dc stitch), work 1 dc sts in the first stitch (where you worked the sl st), chain 1, work 2 dc sts in the same stitch and chain 4. [Skip 4 stitches, work 2 dc sts in the 5th st, ch 1, 2 dc sts in the same stitch and chain 4]. Repeat from [ to ] around. Join the round with a slip stitch to the 3rd chain from the beginning if the round, then continue to slip stitch to the the first dc st, then to thechain 1 space with color B. (12 shells, 12 chain-4 spaces)
Round 3 (using color B): Ch 1. Work 1 sc in the next ch-1 space. Ch 2, skip the next 2 dc sts, dc in the second and third stitches from 2 rounds below, working around the chain space from the previous round. Ch 2, skip the next 2 dc from the previous round. [Sc in the next ch-1 space, ch 2, skip next 2 dc sts, dc in the second and third stitches 2 rounds below (working around the chain space), ch 2, skip the next 2 dc sts.] Repeat from [ to ] around.
Join with a sl st to the first sc of the round. Sl st into the next ch-2 space, sl st into the first dc, then sl st to the space between the dc posts using Color A. (12 sc sts,24 dc sts, 24 chain-2 spaces)
Round 4 (using color A): Chain 3 (counts as a dc stitch), work 1 dc sts in the same space (where you worked the sl st), chain 1, work 2 dc sts in the same space and chain 4. [Skip all the stitches to the next space between the two double crochet posts, work 2 dc sts , ch 1, 2 dc sts all in the same space and chain 4]. Repeat from [ to ] around. Join the round with a slip stitch to the 3rd chain from the beginning if the round, then continue to slip stitch to the the first dc st, then to the chain 1 space with color B. (12 shells, 12 chain-4 spaces)
Round 5 (using color B): Ch 1. Work 1 sc in the next ch-1 space. Ch 2, skip the next 2 dc sts. Dc into the first ch-2 space from 2 rounds below, skip the next st, then dc into the next ch-2 space from 2 rounds below, working around the chain space from the previous round. Ch 2, skip the next 2 dc from the previous round. [Dc into the first ch-2 space from 2 rounds below, skip the next st, dc into the next ch-2 space from 2 rounds below (working around the chain space), ch 2, skip the next 2 dc sts.] Repeat from [ to ] around. Join with a sl st to the first sc of the round. Sl st into the next ch-2 space, sl st into the first dc, then sl st to the space between the dc posts using Color A. (12 sc sts, 24 dc sts, 24 chain-2 spaces)
Repeat Rounds 4 and 5 until your hat measures 6.5″ (16.5 cm) tall, or until it is 1″ (2.5 cm) shorter than the desired finished height.
Then, begin the decrease rounds.
Decreasing
Join the last round with a slip stitch to the first sc stitch using Color A.
Fasten off Color B and cut the yarn.
Round 1 (using color A): Ch 3 (does not count as a stitch). Work 1 dc in the first ch-2 space. [Dc in the space between the dc posts from the previous round, 1 dc in each of the next two ch-2 spaces.] Repeat from [ to ] around. Join with a sl st to the first dc of the round. (30 sts)
Round 2: Work a dc decrease (dc2tog) over the first two stitches, and repeat a dc2tog in each stitch around. Join with a sl st to the first dc of the round. (15 sts)
Round 3: Work a dc decrease (dc2tog) over the first two stitches, and repeat a dc2tog in each stitch around. Join with a sl st to the first dc of the round. (8 sts)
Finishing
Fasten off and cut the yarn, leaving a 10” (25 cm) tail.
Thread the tail onto a tapestry needle, and whip stitch around the top opening of the hat. Pull gently but firmly to tighten the circle as much as possible, then use the needle to close any remaining gap at the top.
Weave in all remaining yarn ends using the tapestry needle.
(Optional) Attach a faux fur pompom to the top of the hat for a decorative touch.

Get the Full Premium PDF Pattern
Ready to get started? Download the full, detailed pattern here: https://www.ravelry.com/patterns/library/heart-lace-beanie-2. It includes clear step by step instructions and tips to guide you from start to finish.
Teen Slouch Hat Pattern (20”/50 cm circumference/8 -8.5”/20-21 cm height)
The elastic band (using color A): chain 11.
Note: this pattern is for simple brim. If you desire to make a folded double brim, then chain a double number of chains and follow the pattern.
Row 1: Sc in 2nd ch from hook. Sc in each chain stitch to the end of the chain (10 sc sts).
Starting row 2, we’ll be working all the stitches in the back loop only. To avoid loops at the edge, the last stitch of each row will be worked using both top.
Row 2: Ch 1 and turn, scblo in the first stitch and in each st across, working the last st using both top loops. (9 scblo, 1 sc)
Row 3 – 65: repeat row 2.
The band should wrap comfortably ar ound your head at this point. If it seems too big, or you want a tighter hat you are welcome to leave off some of the final rows. If you want a little larger, add some more rows to the desired length. Always remember the rows count should be a multiple of 5 to to maintain the same stitch count as the pattern calls for.
Do not cut yarn! Continue with the Seam!
THE SEAM: Fold the piece into half, hold row 1 edge above the last row edge. Chain 1 and slip stitch the short sides together inserting the hook through the back loops of the first side and through the unworked loops of the foundation chain .
Chain 1 and flip the band inside out.
The Body of the Hat
Work in the round around the edge.
Round 1: Chain 1, work around the edge 65 sc st (working one st into each “rib” st and one st into each “valley” st on the edge); join round with sl st to top of first sc st. (65 sc sts)
Round 2 (using color A): Chain 3 (counts as a dc stitch), work 1 dc sts in the first stitch (where you worked the sl st), chain 1, work 2 dc sts in the same stitch and chain 4. [Skip 4 stitches, work 2 dc sts in the 5th st, ch 1, 2 dc sts in the same stitch and chain 4]. Repeat from [ to ] around. Join the round with a slip stitch to the 3rd chain from the beginning if the round, then continue to slip stitch to the the first dc st, then to thechain 1 space with color B. (13 shells, 13 chain-4 spaces)
Round 3 (using color B): Ch 1. Work 1 sc in the next ch-1 space. Ch 2, skip the next 2 dc sts, dc in the second and third stitches from 2 rounds below, working around the chain space from the previous round. Ch 2, skip the next 2 dc from the previous round. [Sc in the next ch-1 space, ch 2, skip next 2 dc sts, dc in the second and third stitches 2 rounds below (working around the chain space), ch 2, skip the next 2 dc sts.] Repeat from [ to ] around.
Join with a sl st to the first sc of the round. Sl st into the next ch-2 space, sl st into the first dc, then sl st to the space between the dc posts using Color A. (13 sc sts, 26 dc sts, 26 chain-2 spaces)
Round 4 (using color A): Chain 3 (counts as a dc stitch), work 1 dc sts in the same space (where you worked the sl st), chain 1, work 2 dc sts in the same space and chain 4. [Skip all the stitches to the next space between the two double crochet posts, work 2 dc sts , ch 1, 2 dc sts all in the same space and chain 4]. Repeat from [ to ] around. Join the round with a slip stitch to the 3rd chain from the beginning if the round, then continue to slip stitch to the the first dc st, then to the chain 1 space with color B. (13 shells, 13 chain-4 spaces)
Round 5 (using color B): Ch 1. Work 1 sc in the next ch-1 space. Ch 2, skip the next 2 dc sts. Dc into the first ch-2 space from 2 rounds below, skip the next st, then dc into the next ch-2 space from 2 rounds below, working around the chain space from the previous round. Ch 2, skip the next 2 dc from the previous round. [Dc into the first ch-2 space from 2 rounds below, skip the next st, dc into the next ch-2 space from 2 rounds below (working around the chain space), ch 2, skip the next 2 dc sts.] Repeat from [ to ] around. Join with a sl st to the first sc of the round. Sl st into the next ch-2 space, sl st into the first dc, then sl st to the space between the dc posts using Color A. (13 sc sts, 26 dc sts, 26 chain-2 spaces)
Repeat Rounds 4 and 5 until your hat measures 7″ (17.5 cm) tall, or until it is 1″ (2.5 cm) shorter than the desired finished height.
Then, begin the decrease rounds.
Decreasing
Join the last round with a slip stitch to the first sc stitch using Color A.
Fasten off Color B and cut the yarn.
Round 1 (using color A): Ch 3 (does not count as a stitch). Work 1 dc in the first ch-2 space. [Dc in the space between the dc posts from the previous round, 1 dc in each of the next two ch-2 spaces.] Repeat from [ to ] around. Join with a sl st to the first dc of the round. (33 sts)
Round 2: Work a dc decrease (dc2tog) over the first two stitches, and repeat a dc2tog in each stitch around. Join with a sl st to the first dc of the round. (17 sts)
Round 3: Work a dc decrease (dc2tog) over the first two stitches, and repeat a dc2tog in each stitch around. Join with a sl st to the first dc of the round. (9 sts)
Finishing
Fasten off and cut the yarn, leaving a 10” (25 cm) tail.
Thread the tail onto a tapestry needle, and whip stitch around the top opening of the hat. Pull gently but firmly to tighten the circle as much as possible, then use the needle to close any remaining gap at the top.
Weave in all remaining yarn ends using the tapestry needle.
(Optional) Attach a faux fur pompom to the top of the hat for a decorative touch.
Women Slouch Hat Pattern (22”/55 cm circumference/ 9 -9.5”/22.5 -24 cm height)
The elastic band (using color A): chain 12.
Note: this pattern is for simple brim. If you desire to make a folded double brim, then chain a double number of chains and follow the pattern.
Row 1: Sc in 2nd ch from hook. Sc in each chain stitch to the end of the chain (11 sc sts).
Starting row 2, we’ll be working all the stitches in the back loop only. To avoid loops at the edge, the last stitch of each row will be worked using both top.
Row 2: Ch 1 and turn, scblo in the first stitch and in each st across, working the last st using both top loops. (10 scblo, 1 sc)
Row 3 – 70: repeat row 2.
The band should wrap comfortably ar ound your head at this point. If it seems too big, or you want a tighter hat you are welcome to leave off some of the final rows. If you want a little larger, add some more rows to the desired length. Always remember the rows count should be a multiple of 5 to to maintain the same stitch count as the pattern calls for.
Do not cut yarn! Continue with the Seam!
THE SEAM: Fold the piece into half, hold row 1 edge above the last row edge. Chain 1 and slip stitch the short sides together inserting the hook through the back loops of the first side and through the unworked loops of the foundation chain .
Chain 1 and flip the band inside out.
The Body of the Hat
Work in the round around the edge.
📹 Video Tutorial
Prefer to watch and crochet along? Check out the full YouTube tutorial here: https://youtu.be/Nt0OqSGPjVM
This video breaks down every step, making it easy even for first-time crocheters.
Round 1: Chain 1, work around the edge 70 sc st (working one st into each “rib” st and one st into each “valley” st on the edge); join round with sl st to top of first sc st. (70 sc sts)
Round 2 (using color A): Chain 3 (counts as a dc stitch), work 1 dc sts in the first stitch (where you worked the sl st), chain 1, work 2 dc sts in the same stitch and chain 4. [Skip 4 stitches, work 2 dc sts in the 5th st, ch 1, 2 dc sts in the same stitch and chain 4]. Repeat from [ to ] around. Join the round with a slip stitch to the 3rd chain from the beginning if the round, then continue to slip stitch to the the first dc st, then to thechain 1 space with color B. (14 shells, 14 chain-4 spaces)
Round 3 (using color B): Ch 1. Work 1 sc in the next ch-1 space. Ch 2, skip the next 2 dc sts, dc in the second and third stitches from 2 rounds below, working around the chain space from the previous round. Ch 2, skip the next 2 dc from the previous round. [Sc in the next ch-1 space, ch 2, skip next 2 dc sts, dc in the second and third stitches 2 rounds below (working around the chain space), ch 2, skip the next 2 dc sts.] Repeat from [ to ] around.
Join with a sl st to the first sc of the round. Sl st into the next ch-2 space, sl st into the first dc, then sl st to the space between the dc posts using Color A. (14 sc sts, 28 dc sts, 28 chain-2 spaces)
Round 4 (using color A): Chain 3 (counts as a dc stitch), work 1 dc sts in the same space (where you worked the sl st), chain 1, work 2 dc sts in the same space and chain 4. [Skip all the stitches to the next space between the two double crochet posts, work 2 dc sts , ch 1, 2 dc sts all in the same space and chain 4]. Repeat from [ to ] around. Join the round with a slip stitch to the 3rd chain from the beginning if the round, then continue to slip stitch to the the first dc st, then to the chain 1 space with color B. (14 shells, 14 chain-4 spaces)
Round 5 (using color B): Ch 1. Work 1 sc in the next ch-1 space. Ch 2, skip the next 2 dc sts. Dc into the first ch-2 space from 2 rounds below, skip the next st, then dc into the next ch-2 space from 2 rounds below, working around the chain space from the previous round. Ch 2, skip the next 2 dc from the previous round. [Dc into the first ch-2 space from 2 rounds below, skip the next st, dc into the next ch-2 space from 2 rounds below (working around the chain space), ch 2, skip the next 2 dc sts.] Repeat from [ to ] around. Join with a sl st to the first sc of the round. Sl st into the next ch-2 space, sl st into the first dc, then sl st to the space between the dc posts using Color A. (14 sc sts, 28 dc sts, 28 chain-2 spaces)
Repeat Rounds 4 and 5 until your hat measures 8″ (20 cm) tall, or until it is 1″ (2.5 cm) shorter than the desired finished height.
Then, begin the decrease rounds.
Decreasing
Join the last round with a slip stitch to the first sc stitch using Color A.
Fasten off Color B and cut the yarn.
Round 1 (using color A): Ch 3 (does not count as a stitch). Work 1 dc in the first ch-2 space. [Dc in the space between the dc posts from the previous round, 1 dc in each of the next two ch-2 spaces.] Repeat from [ to ] around. Join with a sl st to the first dc of the round. (35 sts)
Round 2: Work a dc decrease (dc2tog) over the first two stitches, and repeat a dc2tog in each stitch around. Join with a sl st to the first dc of the round. (18 sts)
Round 3: Work a dc decrease (dc2tog) over the first two stitches, and repeat a dc2tog in each stitch around. Join with a sl st to the first dc of the round. (9 sts)
Finishing
Fasten off and cut the yarn, leaving a 10” (25 cm) tail.
Thread the tail onto a tapestry needle, and whip stitch around the top opening of the hat. Pull gently but firmly to tighten the circle as much as possible, then use the needle to close any remaining gap at the top.
Weave in all remaining yarn ends using the tapestry needle.
(Optional) Attach a faux fur pompom to the top of the hat for a decorative touch.
Women Large Slouch Hat Pattern (23”/58 cm circumference/9.5 – 10”/24 -25 cm height)
The elastic band (using color A): chain 13.
Note: this pattern is for simple brim. If you desire to make a folded double brim, then chain a double number of chains and follow the pattern.
Row 1: Sc in 2nd ch from hook. Sc in each chain stitch to the end of the chain (12 sc sts).
Starting row 2, we’ll be working all the stitches in the back loop only. To avoid loops at the edge, the last stitch of each row will be worked using both top.
Row 2: Ch 1 and turn, scblo in the first stitch and in each st across, working the last st using both top loops. (11 scblo, 1 sc)
Row 3 – 75: repeat row 2.
The band should wrap comfortably ar ound your head at this point. If it seems too big, or you want a tighter hat you are welcome to leave off some of the final rows. If you want a little larger, add some more rows to the desired length. Always remember the rows count should be a multiple of 5 to to maintain the same stitch count as the pattern calls for.
Do not cut yarn! Continue with the Seam!
THE SEAM: Fold the piece into half, hold row 1 edge above the last row edge. Chain 1 and slip stitch the short sides together inserting the hook through the back loops of the first side and through the unworked loops of the foundation chain .
Chain 1 and flip the band inside out.
The Body of the Hat
Work in the round around the edge.
Round 1: Chain 1, work around the edge 75 sc st (working one st into each “rib” st and one st into each “valley” st on the edge); join round with sl st to top of first sc st. (75 sc sts)
Round 2 (using color A): Chain 3 (counts as a dc stitch), work 1 dc sts in the first stitch (where you worked the sl st), chain 1, work 2 dc sts in the same stitch and chain 4. [Skip 4 stitches, work 2 dc sts in the 5th st, ch 1, 2 dc sts in the same stitch and chain 4]. Repeat from [ to ] around. Join the round with a slip stitch to the 3rd chain from the beginning if the round, then continue to slip stitch to the the first dc st, then to thechain 1 space with color B. (15 shells, 15 chain-4 spaces)
Round 3 (using color B): Ch 1. Work 1 sc in the next ch-1 space. Ch 2, skip the next 2 dc sts, dc in the second and third stitches from 2 rounds below, working around the chain space from the previous round. Ch 2, skip the next 2 dc from the previous round. [Sc in the next ch-1 space, ch 2, skip next 2 dc sts, dc in the second and third stitches 2 rounds below (working around the chain space), ch 2, skip the next 2 dc sts.] Repeat from [ to ] around.
Join with a sl st to the first sc of the round. Sl st into the next ch-2 space, sl st into the first dc, then sl st to the space between the dc posts using Color A. (15 sc sts, 30 dc sts, 30 chain-2 spaces)
Round 4 (using color A): Chain 3 (counts as a dc stitch), work 1 dc sts in the same space (where you worked the sl st), chain 1, work 2 dc sts in the same space and chain 4. [Skip all the stitches to the next space between the two double crochet posts, work 2 dc sts , ch 1, 2 dc sts all in the same space and chain 4]. Repeat from [ to ] around. Join the round with a slip stitch to the 3rd chain from the beginning if the round, then continue to slip stitch to the the first dc st, then to the chain 1 space with color B. (15 shells, 15 chain-4 spaces)
Round 5 (using color B): Ch 1. Work 1 sc in the next ch-1 space. Ch 2, skip the next 2 dc sts. Dc into the first ch-2 space from 2 rounds below, skip the next st, then dc into the next ch-2 space from 2 rounds below, working around the chain space from the previous round. Ch 2, skip the next 2 dc from the previous round. [Dc into the first ch-2 space from 2 rounds below, skip the next st, dc into the next ch-2 space from 2 rounds below (working around the chain space), ch 2, skip the next 2 dc sts.] Repeat from [ to ] around. Join with a sl st to the first sc of the round. Sl st into the next ch-2 space, sl st into the first dc, then sl st to the space between the dc posts using Color A. (15 sc sts, 30 dc sts, 30 chain-2 spaces)
Repeat Rounds 4 and 5 until your hat measures 8.5″ (21 cm) tall, or until it is 1″ (2.5 cm) shorter than the desired finished height.
Then, begin the decrease rounds.
Decreasing
Join the last round with a slip stitch to the first sc stitch using Color A.
Fasten off Color B and cut the yarn.
Round 1 (using color A): Ch 3 (does not count as a stitch). Work 1 dc in the first ch-2 space. [Dc in the space between the dc posts from the previous round, 1 dc in each of the next two ch-2 spaces.] Repeat from [ to ] around. Join with a sl st to the first dc of the round. (38 sts)
Round 2: Work a dc decrease (dc2tog) over the first two stitches, and repeat a dc2tog in each stitch around. Join with a sl st to the first dc of the round. (19 sts)
Round 3: Work a dc decrease (dc2tog) over the first two stitches, and repeat a dc2tog in each stitch around. Join with a sl st to the first dc of the round. (10 sts)
Finishing
Fasten off and cut the yarn, leaving a 10” (25 cm) tail.
Thread the tail onto a tapestry needle, and whip stitch around the top opening of the hat. Pull gently but firmly to tighten the circle as much as possible, then use the needle to close any remaining gap at the top.
Weave in all remaining yarn ends using the tapestry needle.
(Optional) Attach a faux fur pompom to the top of the hat for a decorative touch.
✅ Don’t Miss This!
📌 Subscribe to my YouTube channel for more free crochet patterns and tutorials every week: https://youtu.be/Nt0OqSGPjVM !
📌 Pin this pattern on Pinterest so you can find it later!
Get the Full Premium PDF Pattern
Ready to get started? Download the full, detailed pattern here: https://www.ravelry.com/patterns/library/heart-lace-beanie-2. It includes clear step by step instructions and tips to guide you from start to finish.
crochet heart lace beanie, crochet heart hat tutorial, crochet valentine hat, easy crochet beanie beginner, heart stitch crochet hat, crochet lace beanie tutorial, crochet romantic hat, crochet heart beanie step by step, diy crochet heart lace beanie, crochet lace heart hat pattern, crochet beanie with hearts, crochet love beanie, crochet heart pattern hat, crochet cute beanie
Join Our Crochet Community!
Loved this crochet beanie hat pattern? Want more easy and stylish crochet projects delivered straight to your inbox? Subscribe to our email list today! Get exclusive patterns, tips, and tutorials to help you grow your crochet skills and stay inspired. Whether you’re a beginner or an experienced crocheter, there’s always something new to discover.
Simply enter your email below, and you’ll never miss a stitch!
Happy crocheting, and we can’t wait to see you in our community! 😊
What’s Next?
Pin this post: Save this tutorial to your >>>Pinterest <<< boards so that you can come back to it later.
Subscribe to my YouTube Channel to stay updated to all my new tutorials: https://www.youtube.com/@SilvanaCrochetStudio
Leave a comment: We love to hear your feedback. Tell me in the comments below!
Share on Facebook: When you make this project, share it on social media and tag me.
Subscribe to my YouTube channel for more free crochet video tutorials!
Have questions? Join the Facebook Group! We created this group for you to share pictures, ask questions, and help each other out.
You are more than welcome to sell your finished items, but please give Silvana Crochet Studio credit as pattern designer and link back to my shop Ravelry https://www.ravelry.com/designers/silvana-hagiu
If you have any questions about this pattern please feel free to message me.
My patterns (including all photographs) are copyrighted. You may NOT copy, re-distribute or sell my pattern.
crochet heart lace beanie hat tutorial
easy crochet heart hat beginner
crochet valentine’s day beanie
heart lace stitch crochet hat pattern
crochet romantic lace hat tutorial
diy crochet hat with hearts
crochet beanie with lace hearts
crochet heart stitch beanie step by step
